
I love to hand quilt but I still need some practice. I've been hand quilting my small quilts for years but I don't feel like I have it mastered yet. My stitches are too big and sometimes quirky. This doesn't stop me, however. Luckily, the hand-quilting police haven't pulled me over yet, although I've had some close calls. I hand quilted all of the quilts in my first 2 books, the little ones in my 3rd, and some in the new book - not because I am such a purist, but because it's just easier for me to get that simple quilted look that you see in some antique quilts. If I could figure out a way to use the machine to get the look I like, trust me, I would, although I admit I love the calm, relaxing thing about hand quilting when I'm not in a hurry.
The problem is that most of the quilts are for books and I get rushed making them on a deadline and so simple hand stitching always seems the easiest way to get them done so that they have that old-fashioned look. But I never seem to have time to do all the quilting I'd like to on my quilts and most of what I do is straight lines to get them done fast. Now that the book is done, I just may try to branch out and do a little more.

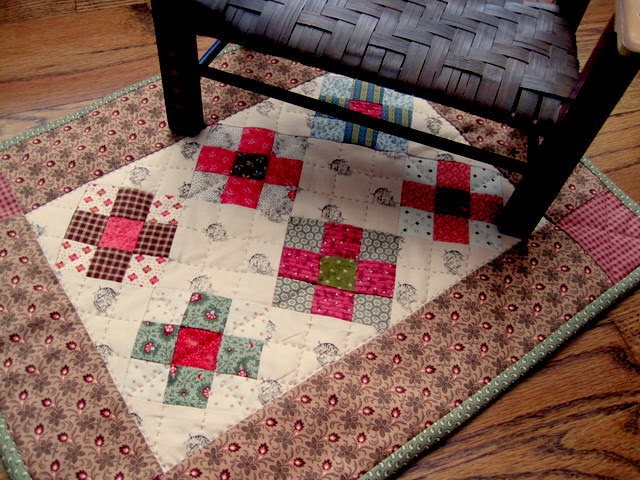
I also haven't mastered machine quilting my small quilts at all and when I do try it I sometimes don't like the way they look when I'm finished. I need to practice that too when I have time. I love the look of a little antique doll quilt quilted very simply and you really can't get that soft, puckered look from a machine.

I do want to get better at hand quilting, however, and lately I've found quite a few stencils here that are easy to use with a water soluble marking pen. They also have quilting stencils for small quilt borders so check out the border page. This little one is one of my favorites.


I found this old book that has quite a few quilting designs (300!) especially for small quilts and I'd really like to try a few of them but I'm not sure how I'll go about marking the designs on my little quilts. Any suggestions? It seems like way too much work to trace them onto template plastic to make a stencil and then cut out the pattern.


One thing I've heard is to use the tear-away method. Have any of you tried this? I think you trace the pattern and mark it onto special quilting tissue-like paper. Then you stitch onto the paper, following the design, and tear the paper away. I wonder if this will work? I already bought the paper but haven't tried it yet. I'm sure this will work with machine quilting but I can't imagine hand quilting through the paper. There has to be a better way. Help! I really want to use some of these designs.


31 comments:
Handquilting is so fun to do. Relaxing and I love the look of it. Love the wave stencil you have found.
Happy new year. And thank you for all the inspiration your blog brings.
I have been a hand quilter for 30+ years (!), and I certainly haven't mastered hand quilting. I do know if I haven't hand quilted in a while (which could mean days, weeks, months) my stitches go back to looking like a beginners.
I hand quilt doll quilts without a hoop and my quilting stitches are uneven and sometimes large, but these are doll quilts which, in the past, were made by little girls practicing making quilts. So I forgive myself. :-)
Happy New Year! I am delighted I've found your blogs, your books, and your Yahoo group. What an inspiration! Thank you so much!
Would using a light box work? You can buy these push lights you put into closets and put them under a piece of clear plastic or glass so you can see the pattern. I found 3 small ones(leds: cool light) in a package that, together, should give out enough light... You could do this before you sandwich the piece....
PS: Use the extender to your sewing machine..the cool lights fit underneath and don't bother the hard plastic.
I am about to quilt a small quilt and sure wish I had your book on quilting designs for small quilts. May have to search Amazon for it!
I sometimes use freezer paper to guide my quilting designs when I machine quilt. Mostly for simple borders or repeated hearts, etc., that I want a consistent look for.
I am about to try pounced powder to mark a stencil vs. the water soluble pens. I'll let you know how I like it.
I think your hand-quilting is very nice. No, not the very tiniest I've seen, but really very good. To me it's more inspirational to see work like yours. The quilting of the Amish ladies, or the Thimble Lady are so tiny, so perfect, it seems impossible to even try.
Have you seen the new Saskiko machines? The work on top really does look just like hand quilting. Perfectly even.
Kathy, I am with you when it comes to hand quilting. As for using the designs in boooks I have heard that you can trace the design on to Press and Seal and stick it to your quilt and quilt through it. I have not tried it, but it might be worth a try.
Your stitches are perfect for your quilts. I'm always inspired to hand quilt the little doll quilts I make from your three books. And I'm so looking forward to the new book. I don't think there is any right way to hand quilt these little quilts. You quilt the way you can and that makes it perfect. Happy New Year.
Pat - I agree. I don't like to be put off on doing something I like to do just because it isn't perfect. I wouldn't get anything done if I waited for it to be perfect! Much more fun to enjoy the whole process and I will be learning for the rest oif my life it seems!
First off, I think your quilting is wonderful and I have had a chance to see some of your pieces close-up. I believe we can all improve our stitches, and that just happens with time and practice. But, I love the way you quilt your little quilts!
As far as using the quilt patterns in the book. I have copied them to plastic and made my own stencils. It is time consuming, but then I have the stencil to use on other projects. Sometimes I just use a heavy cardstock to make a stencil, easier to cut and I can copy the stencil to the cardstock by sending it through my printer.
The book you have, "Think Small", is definately one I am going to have to track down.
Good luck with your quilting. Happy New Year!
I recently saw a tip on a blog about marking quilts using netting fabric. I can't think of what it's called now, but I think it's the kind used in wedding veils. You can trace the design on the netting with a pencil and then place this over the quilt. When you mark the quilt you use a blue marker that washes off. The blue marker goes through the holes in the net and you can quilt following the blue lines. I haven't tried it, but it seems like it might work. I think I'll try it. I usually quilt straight lines when I hand quilt, or do baptist fans that I mark as I go (they aren't too perfect)!
Love your hand quilting - I'm learning too, and it will be fun to see if I can get better at it as time goes on. It just adds the "magic" to a sweet little quilt! That wavy stencil looks wonderful on your quilt - will have to look for one of those!
Kathy,I love the way your quilts turn out when you hand quilt them.
I have that book and just love it. I haven't tried any of the patterns either because I didn't know how to transfer the design to the quilt.
I have used the tissue paper to machine quilt but am not a big fan of it.
I like the idea of the netting fabric from "Country Log Cabin". I think I will try that with these cute little patterns.
Happy New Year!! Karen In IL.
Kathy, to use the patterns without making plastic templates - trace them onto freezer paper, stitch without thread to make holes, then you can pounce with chalk to get your lines (iron the freezer paper onto the quilt first of course LOL)
That looks like a great book - I just checked our provincial library, and shoot, nobody has it!! Oh, well :)
Happy new year!
Gerda in Alberta
Not too impressed with the pouncing powder. Didn't work well on the real small pieces. Might work better on large open spaces.
Straight lines are good for little quilts too! I think it would be hard to hand quilt through any paper. What I have done and is pretty quick is this: Make a copy of the stencil you want in the size you want. Use spray adhesive to stick the copy on a thin piece of cardboard. (I use empty cereal boxes) Then cut it out and use it! It is a lot faster then trying to make perfect stencils with plastic.
I really like it that you hand quilt your pieces!! Happy New year!!
Maybe this book of little quilting designs is going to be just for dreaming and looking through and perhaps I should just stick to straight lines on my quilts, huh?
Don't give up yet. There is a great product called "Stitch & Soak Transfer paper". It is made for embroidery, but it might work for small quilts, I think it would be too expensive to use for big ones. You use it in your printer, copy your design onto it, then peel off the backing paper, stick it to your fabric, then disolve it in water when your done. I have used it for embroidery and love it. I never thought about using it for quilting until I read your blog just now. I am going to try it and see how it works. FYI I get mine from www.treasuredthreadsonline.com I emailed them and they sent me the info. Good luck.
I was going to say what Gerda suggested, trace them, sew without thread and then use pounce. I have had good luck using it on small quilts.
I just have to say how much I love your small quilts. They seem to have the essence of everthing I love in quilting in them. Good luck with everything!
Just enjoy quilting those lovely little quilts! Quilt stitches are like handwriting: personal and unique! Please don't be put off by stories of "perfect" stitches, it is the sheer joy of making them that counts! Have a Prosperous 2011 with lots of happy stitches!! XXXD
I find the simplicity of your stitching is very beautiful in the quilts you make! They wouldn't be "Kathleen's" quilts if you did them differently.
I recently used a stencil on your pattern "Harvest Quilt". I just posted it on my blog if you would like to see. ( I am not sure how to link your blog to mine or I would have done so) I have ordered your newest book and I am looking forward to receiving it in the mail!! Should be soon! :0)
Your little quilts are always adorable. I have used tulle to copy the stencils from books, have you tried this method? It works very nicely. I have used the gold paper you have, but only for machine quilting, I cannot imagine using it for hand quilting...to stiff!
i love to hand quilt too [for all the same reasons], Kathy and my stitch length varies greatly, but that doesn't deter me, it's all part of the charm of handmade. i agree, small quilts lend themselves to simpler/naive quilting designs anything too ornate would spoil them..though i must admit the designs in your book are adorable :)
I really love the hand quilting look on your quilts and it inspires me to do the same! I can't think of another way then making them with template plastic, that is what I would do anyway. But I do love the straight lines you usually quilt!
Hi Kathy,
Here is what I have been thinking about, since I encountered the same problem. I just finished the top of your ‘Little Red Schoolhouse Quilt’. Looking at it makes me very happy! ☺
I wanted to quilt the border with an orange peel template. The orange peel is in a 45 degree angle and an inch high. The peels pair up and switch directions. Ha, am I making sense? I will post the picture in your Yahoo group once I am done. That will make things clearer. I hope.
I ended up using template plastic, since I plan to make the same quilt for a friend. But here is what I thought about.
Option 1)
Scan the design. Print. Laminate the copy; use a thin sheet. Cut out with a pair of scissors or use a knife (and cutting board).
Two examples:
a) First picture, page on the right, top left design, after laminating:
Cut out three or four leaves with a knife.
Just turn your template as you go.
Since all the leaves are the same size, this should work.
Hm, the only problem that just occurred to me is that you wouldn’t be able to see through your template. Does ‘see-through’ paper for printers exist? It probably does, but I never heard of it.
b) Last picture, page on the right, bottom left design, after laminating:
Since this is a solid shape, you could use a pair of scissors for cutting out the laminated design. With this design it doesn’t matter if you can’t see through your template.
(Oh, it is the same page from the same book. ☺)
What I like about option 1 is that you do not even have to trace the design. Once you’ve scanned the design, you can resize it on your computer. I am anxious to try it myself, so I try to hurry coming up with a plan for my next quilt. (I am smiling a lot!)
Option 2)
Another option I thought about is using graphic paper. (I hope this is the right word for what I mean. It is thick, sturdy paper which you can see through. (Sorry, English is not my native language.))
It would be much easier to cut through with a knife. Though as soon as you’re thinking about reusing your template, I would prefer template plastic.
I’m hoping this helps. If you come up with a perfect solution, I hope to read about it on your blog.
Esther
a blog-less quilter from the Netherlands
Esther- I quilted an Orange Peel design on a little quilt in my new book and used a small cup to trace a half circle in the block with a washout quilting marker right on the top, then another that intersected that one to make the peel. Very easy.
Hm, your book should have been published earlier! :-)
Esther
just read thispostfor the first time...I love the "think small" book...paused and logged onto Ebay, and there it was!!! Can't wait to get it...love your books...they are an inspiration!! Chrissy
This stencil is very similar to the serpentine stitch on many sewing machines. One can flatten out the curve by lengthening the stitch length. Sew out a variety of different stitch lengths on cardstock or template plastic (I used a 16 needle but that may not matter) and cut out the shape. Trace your shape with a purple air erase or blue water erase pen on your project and stitch over it by hand or machine. You can do a similar thing with stencil shapes you like by sewing through the template plastic and using a pounce pad. Spray the chalk lightly with hair spray as it comes off easily. I have also made a plastic template of jumbo and medium rick rack and traced these on my project to have a curvy line and to make fabric rick rack for sewing projects.
This stencil is very similar to the serpentine stitch on many sewing machines. One can flatten out the curve by lengthening the stitch length. Sew out a variety of different stitch lengths on cardstock or template plastic (I used a 16 needle but that may not matter) and cut out the shape. Trace your shape with a purple air erase or blue water erase pen on your project and stitch over it by hand or machine. You can do a similar thing with stencil shapes you like by sewing through the template plastic and using a pounce pad. Spray the chalk lightly with hair spray as it comes off easily. I have also made a plastic template of jumbo and medium rick rack and traced these on my project to have a curvy line and to make fabric rick rack for sewing projects.
Post a Comment