Friday, July 3, 2020

Make a Fabric Pinwheel

Do you remember playing with pinwheels as a child? They always remind me of summer and picnics and the Fourth of July. Not many picnics happening this year I'm afraid . . . .  
 

I've made a few pinwheel blocks and quilts in my day. There's just something I love about them.


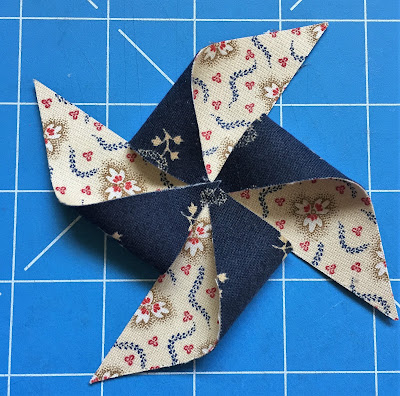
Today I'm going to show you how to create a Fabric Pinwheel.  These are soo easy to make and may be just the crafty project for you to make this holiday weekend.  


Here's what you'll need:

Fabric Scraps
Fusible web (Wonder-Under, Steam-a-Seam, Heat 'n Bond, etc.)
Glue stick, hot glue or needle and  thread
Buttons


1.  Pick two pieces of coordinating fabric for each pinwheel. I cut each square 3 1/2"  x   3 1/2" but you can make them smaller or larger. Each pair needs to be the same size. Cut a piece of fusible web the same size as the squares. 


2.  Press the fusible web to the wrong side of one fabric square. Allow it to cool and then peel off  the paper backing. Line up your fused square with the remaining fabric square and iron the sticky fusible web side to the wrong side of that square. Press for about 10 seconds or follow directions for the fusible product you are using.

IMPORTANT: Try not to get the sticky part on your iron. I use an old pressing cloth or the piece of paper the fusible web was attached to and place it on top of the second square of fabric when I'm pressing.

3.    Now you should have fabric fused on both sides. Trim the edges of your square just a bit. If your fabric starts to fray, you could try dabbing a little Fray Check along the edges.

4.  Next, decide which print you want to use as the background (or inside) and place that side up.   Cut each corner of the square on the diagonal  - but stop halfway to the center.


5.  Fold the 4 corners of the pinwheel blades toward the center and stitch or glue them down one at a time. Gluing is faster. Just sayin'.


6.  Sew a cute matching or contrasting button and that's it, you're done.


Some of you might remember that I made these a few years ago. 


This year, I tried making some in red, white and blue for the Fourth of July. Took me less than an hour.  It will be fun to use these new ones on a wreath, don't you think?


If you intend to use these to decorate a vase or flower pot, buy a couple of thin wooden dowels at a craft store and then use some hot glue to stick them onto the back of each pinwheel. If you're feeling particularly lazy (like me) you can also use a hot glue gun to attach the buttons. 

To make smaller pinwheels, just cut your squares a little smaller. Likewise, larger squares make larger pinwheels. 
 
To me, the hardest part of this whole thing is finding just the right button for each center. It's fun to act like a child again and I had a good time playing around with fabric and digging in my old button jar. Working on a simple project like this can make all my stress disappear. Just looking at them makes me smile. 

If you're in my Facebook group, don't forget to make a pincushion for the Patriotic Pincushion Parade tomorrow and post a picture. 


Saturday, June 27, 2020

Red, White and Blue Season

Summer is here and we're coming up on July. For some of us, that means it's red, white and blue season. I do love the look of quilts made with red, white and blue fabrics. And I am always on the lookout for some pretty prints that combine both red and blue. Especially those with a reproduction theme.


Stars in RWB are always a popular design.


I know some of you decorate with red, white and blue all year long. I've made more than a few of these kinds of small quilts over the years and enjoy displaying some of them around the house in the summer more than any other time of year. 


American Crossroads,from my last book, A Prairie Journey 


Little Red Schoolhouse from Prairie Children & Their Quilts


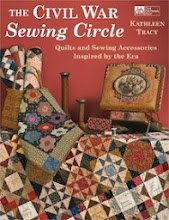
Union Stars from The Civil War Sewing Circle


Gameboard quilt from Prairie Children & Their Quilts


This one is an oldie  : ) from my first book. 

*  *  *

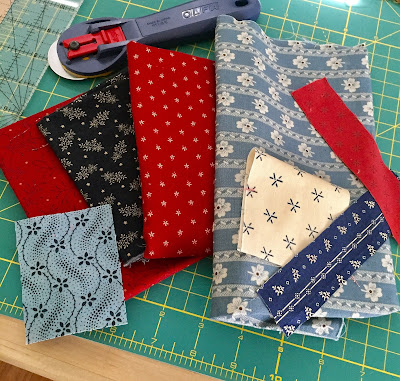
I pulled some fabrics last week for our Patriotic Pincushion Parade coming up in my Facebook and online groups on the 4th of July. This weekend I'm playing around with the fabric and seeing what I can come up with for a design. Small quilt blocks like the ones we've used in our Mystery quilts or Challenges make cute pincushions. Just sayin' . . . . And, come October, you will have some wonderful blocks to choose from when my new book comes out. Schoolgirl Sampler is LOADED with 4" x 4"  blocks.


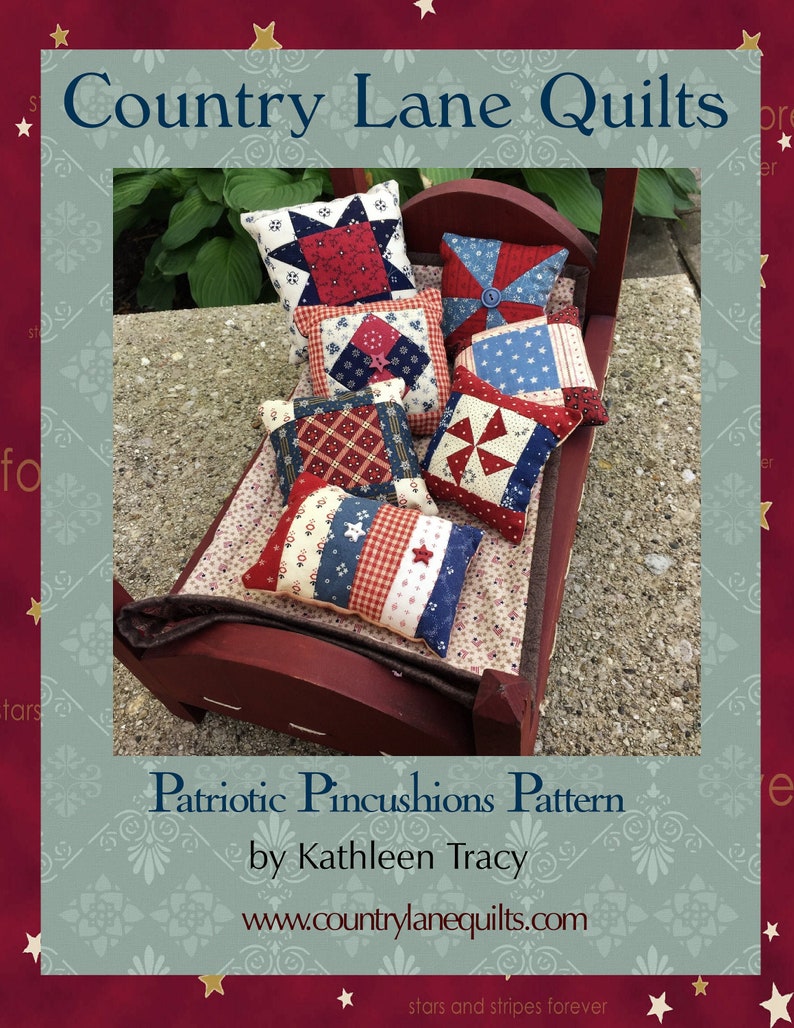
Check out my Etsy shop for a Patriotic Pincushions pattern. Some of you asked me for a pattern and now, a year later, I am finally delivering,  LOL. 


Patriotic Pincushions Pattern image 0          


If you don't have any red, white and blue or red, tan and blue in your own collection of little quilts, maybe this weekend is the time to do something about that. Get out your scraps and play around with some simple blocks until something comes to you. It almost always does if you play hard enough, ha ha. And if quilters don't play then they don't really get anything done, right?

Have a good weekend - Looking forward to seeing some of your pincushions in our FB and other online groups!


Saturday, June 20, 2020

Happy Summer


We're having beautiful weather here. 


We're getting ready to do our annual Patriotic Pincushion Parade in my Facebook group for the 4th of July. Make a pincushion (or two or three) in red, white and blue and join us for some pincushion fun. But don't post a pic your pincushion until the fourth.


Hope you have a good weekend!


Friday, June 12, 2020

My New Book

Yippee! I'm really excited to share the cover of my new book - Schoolgirl Sampler - which will be released in October 2020. I've been waiting a looong time to tell you all about it and it can't come soon enough . . . .


If you like making small blocks and antique-looking sampler quilts, then you're going to love this one. Inspired by the antique sampler quilts so many of us love, Schoolgirl Sampler includes simple instructions for making many of the traditional quilt blocks we all love in small scale. And, in addition to the sampler, there are patterns for six other darling mini-quilts using the blocks.


It's a treasure trove of 4" blocks reminiscent of those sewn by schoolgirls during the nineteenth century.  Combine all 72 blocks into a sampler quilt or select a few favorites to use in any of six other charming doll quilts. The blocks are fun and easy to stitch and are perfect for using your reproduction-fabric scraps. You can complete several blocks in one sitting or finish a small quilt in a weekend. The possibilities for making small quilts are endless. The book also includes plenty of tips for sewing small blocks, simple rotary cutting instructions and clear piecing diagrams -  no paper piecing, tracing or cutting templates to make the 4" x 4" blocks. It's very user friendly! 

Here's an excerpt from the book - 

"The sampler quilt with many different blocks has a long history in American quilt making. I've always adored antique sampler quilts and I know I'm not alone. Almost ten years ago I embarked upon the journey of reproducing the "Mother" of all samplers – the remarkable Jane Stickle quilt from 1863, commonly known as the Dear Jane quilt. My quilt is not quite finished yet but I work on it whenever I get the chance, in between writing books and making other projects. I'm getting close. This quilt, the Schoolgirl Sampler, took me a lot less time to complete and I hope it offers some of you an easier alternative to creating an antique-looking sampler quilt comprised of small blocks."


Schoolgirl Sampler is coming out in early October and hopefully will be available at your local quilt shop around then. If you're interested in getting a signed copy, I'll begin taking pre-orders on my website in July. (Pre-ordering is always recommended since it gives me an idea of how many books I need to buy before it comes out. But even if I have to restock and you have to wait a bit, there will still be plenty of copies available.) International quilters may want to visit the Martingale website to purchase an e-book version when it become available.

I know you'll have a lot of fun making this quilt. I sure did. Have a good weekend!            


Wednesday, June 10, 2020

Tumbler Quilts

Don't you just love the look of antique doll quilts?  I've been playing around with my precious scraps and making some little tumblers. We're doing this for our small quilt challenge for June. I've always wanted to make one of these with an antique look.


This type of quilt was popular in the late nineteenth century, then again in the '30s and '40s. They've recently made a comeback in the past few years and there are all sorts of pretty pics on Pinterest and Instagram if you look for them. Antique Tumbler quilts were often charm quilts, meaning no two tumblers were cut from the same fabric. They were also called "beggar's quilts" since quilters of the time relied on scraps to make their quilts and would beg their friends for pieces of fabric to include or exchange. I think I have enough scraps to make more than a few large quilts, LOL.

I own two tumbler quilts made by friends. The tumbler flag was made for me by Sue Bennett and the blue tumbler quilt was made by Marian Edwards. Now it's time to make one of my own.


Depending upon how you place your tumblers and sew them together into rows, you can get different looks.


Using a ruler or a template, all you do is cut the shapes, arrange them and sew together in rows.

I bought this Mini Fat Cats template at Joann Fabrics. Makes 2" finished tumblers. You can also make your own template from cardboard or plastic. There's a file in my Facebook group with directions and two different-sized tumbler shapes you can trace.


I determined that my favorite tool for making these is the Lil Crumbler ruler by Miss Rosie.  You can use this wedge ruler to make tumblers in different sizes up to 4". After making a few 2" ones, I chose to make mine 1 1/4" finished instead. You can see the difference in the tumblers above. I will definitely make another one someday, maybe using the larger tumblers. These are a lot of fun. 


For some inspiration, here's the adorable little tumbler/thimble quilt Sue Bennett made using some of her pretty reproduction prints. 


I finished sewing my thimbles/tumblers and rows together but still need to decide - does it need a border? Thinking I might go with a lighter print like Sue did if I do decide to put one on. I'll trim the edges and play around with some prints for a couple of days to see what I can come up with.


But I'm still on my way! Damn cute if I say so myself. Hope to finish it up soon.


Friday, May 29, 2020

Sewing by Hand

Do you do much hand sewing? In between trying to finish up some Dear Jane triangles (by machine), I'm working on hand quilting a few small quilts. There's quite a backlog. It's very enjoyable for me and even though the quilts are small, the going is slow. As I was sewing yesterday,  I was reminded of the exhibit on Civil War dresses I saw a few summers ago. When I pick up my needle, I cannot help but think about the amount of hand sewing that went on during that era. How in the world did they do so much of it? 


Many of the dresses that were on display were sewn with exquisite stitches. By HAND. Including the fancy trim, piping, pleating.


By the mid-nineteenth century, some households had treadle sewing machines, but not all families could afford one. In my book Remembering Adelia, Adelia Thomas noted in her 1861 diary that her family was lucky enough to have a treadle machine. At times. some of the local women would come over for the day to sew on it. 


*   *   *

Here are a few more entries from Adelia's diary -

July 29, 1861

The anniversary of my nineteenth birthday! Worked all the day till three o'clock then sewed on my basque—seems as though I should never get it done. 

[Note: A basque was a form-fitting jacket or bodice perhaps worn over a hoop skirt. Some references I found say it was a corset. Imagine having to make your own corset!]

Aug 5, 1861

Emma's seventeenth birthday. Anna and I did quite a large washing. Mother helped to wash the colored clothes. Cut the little girls some purple calico dresses.

 Aug 8, 1861

Washed three calico dresses for myself and one for Em. Got dinner and after the work was done sewed on some embroidery. Finished the girls' dresses and cut out two night dresses for Mother and myself.

Aug 20

Sewed on Mother's dress. 

Aug 24

Slept until eight o'clock then sewed on Mother's dress and almost finished it.


You can see that sewing was pretty much a daily chore among all the other household chores that needed to be finished. My goodness. How lucky we are today. The little bit of hand sewing I do is so pleasurable. I would be very stressed if I had to make clothes for myself and the family too - wouldn't you?


Remembering Adelia has always been a special book to me and it is now out of print.  You can still find copies in some places but the prices are usually ridiculous. You can purchase an e-book version here from my publisher.

During earlier centuries, some women earned their keep by sewing and did piecework for a living. There were few work options for women in general and poor or widowed women took on needlework, millinery, dressmaking or shirtmaking in order to earn ridiculously low wages. 


Here's a poem I ran across written in honor of Mrs Biddell, a poor widow and seamstress living in England under wretched conditions - 

With fingers weary and worn,
With eyelids heavy and red,
A woman sat in unwomanly rags,
Plying her needle and thread -

Stitch! stitch! stitch!
In poverty, hunger and dirt,
And still with a voice of dolorous pitch
She sang the "Song of the Shirt."

The Song of the Shirt  by Thomas Hood, 1843


Thank goodness for the advent of the sewing machine is all I can say . . . . And the fact that my husband sewed a button on his own shirt last week. Gives me more time to enjoy my hand sewing.


Have a wonderful weekend!