Thursday, August 27, 2020

A Few Small Finishes

Making little quilts is a whole lot of fun. But it drives me nuts when I have so many unfinished ones stacked up. It's satisfying to design and make them for my groups but then they always seem to pile up - unfinished - as I constantly move onto other things.  Most of them are simple enough - don't know why I have such a problem finishing them. Last week I decided enough was enough.  I want to work on so many other quilts (large ones, mostly) but I knew if the small ones kept hanging over my head I'd probably never get anything finished. There will always be new projects and ideas pulling me in but sometimes it's good to sit down and just complete something, am I right?

I feel like I've done a FEW little things this year.  For a change, I actually finished a monthly challenge - the small quilt for August. 


And my Tumbler/Thimbles doll quilt - 


Lately, I get giddy when I finally finish something, even something small.  


Other quilts that needed to be finished - 


I pulled out two and kept them on my sewing table. Made a plan - 


                                                                         Here we go -


Yay! 


Yesterday, I finished the other little one. Honestly, it took me all of an hour and a half so I don't know what the problem was that kept me procrastinating so long, LOL. 


All of these quilts are free patterns in my Facebook group and the other small quilt group. Now I've moved on to quilting my little log cabin quilt that was started last year.  Another easy finish I keep putting off. 


              More to do. Maybe I'll get this one finished before NEXT Valentine's Day -   


Wednesday, August 12, 2020

Schoolgirl Sampler Book

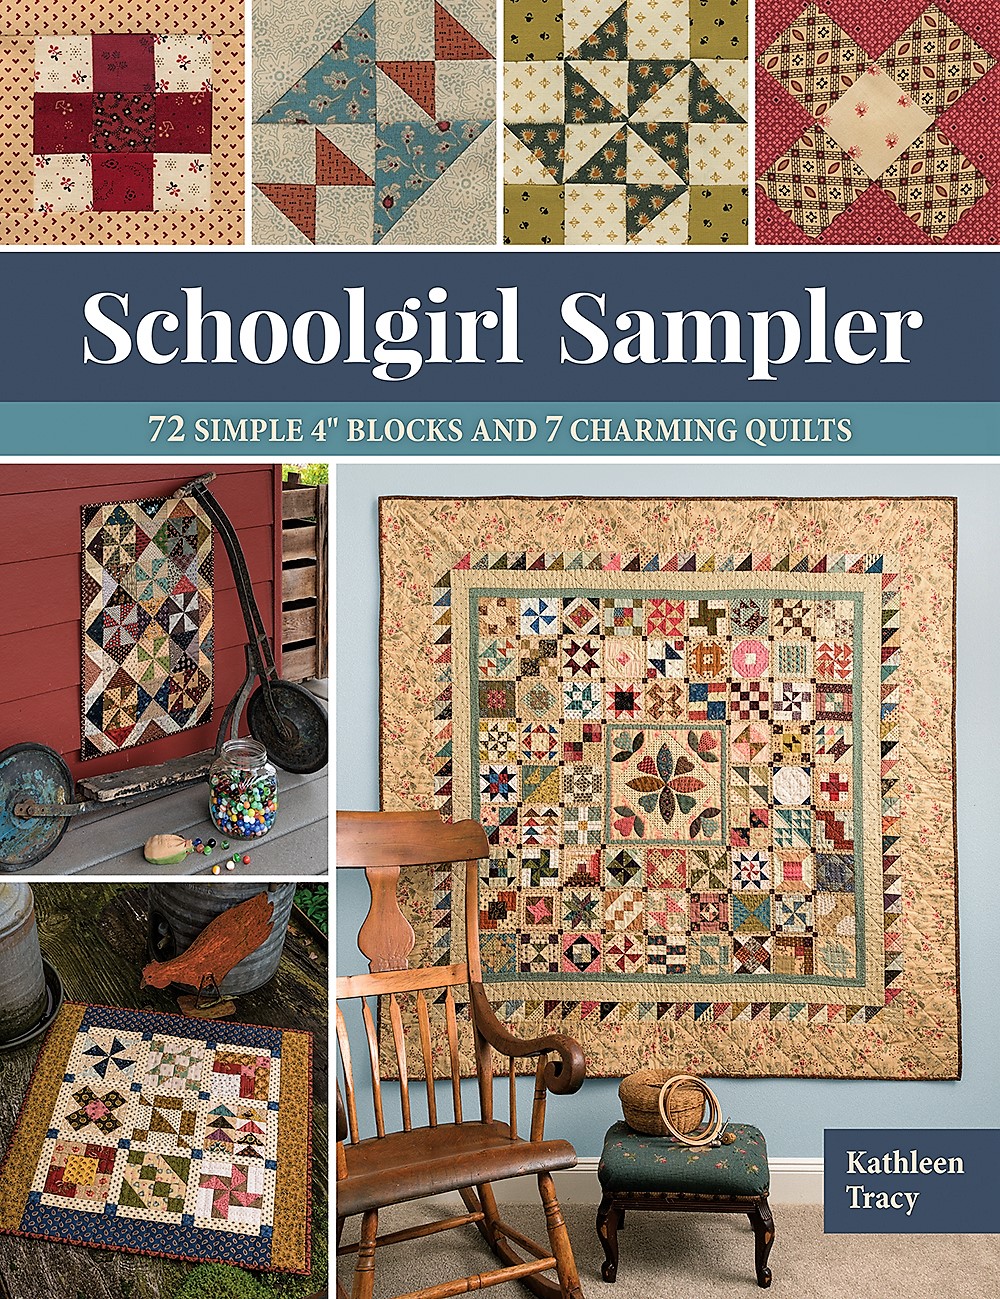
In case some of you have not heard (!), my new book will be released shortly, in October. It's called Schoolgirl Sampler and I know you'll love it. I think it will be a terrific reference book for those of you who love making small quilts. For years to come. So many small blocks, so little time . . . . 


I even love the back cover! I found that cute antique photo of a smiling mother and daughter last year while combing through the booths at an antique mall.


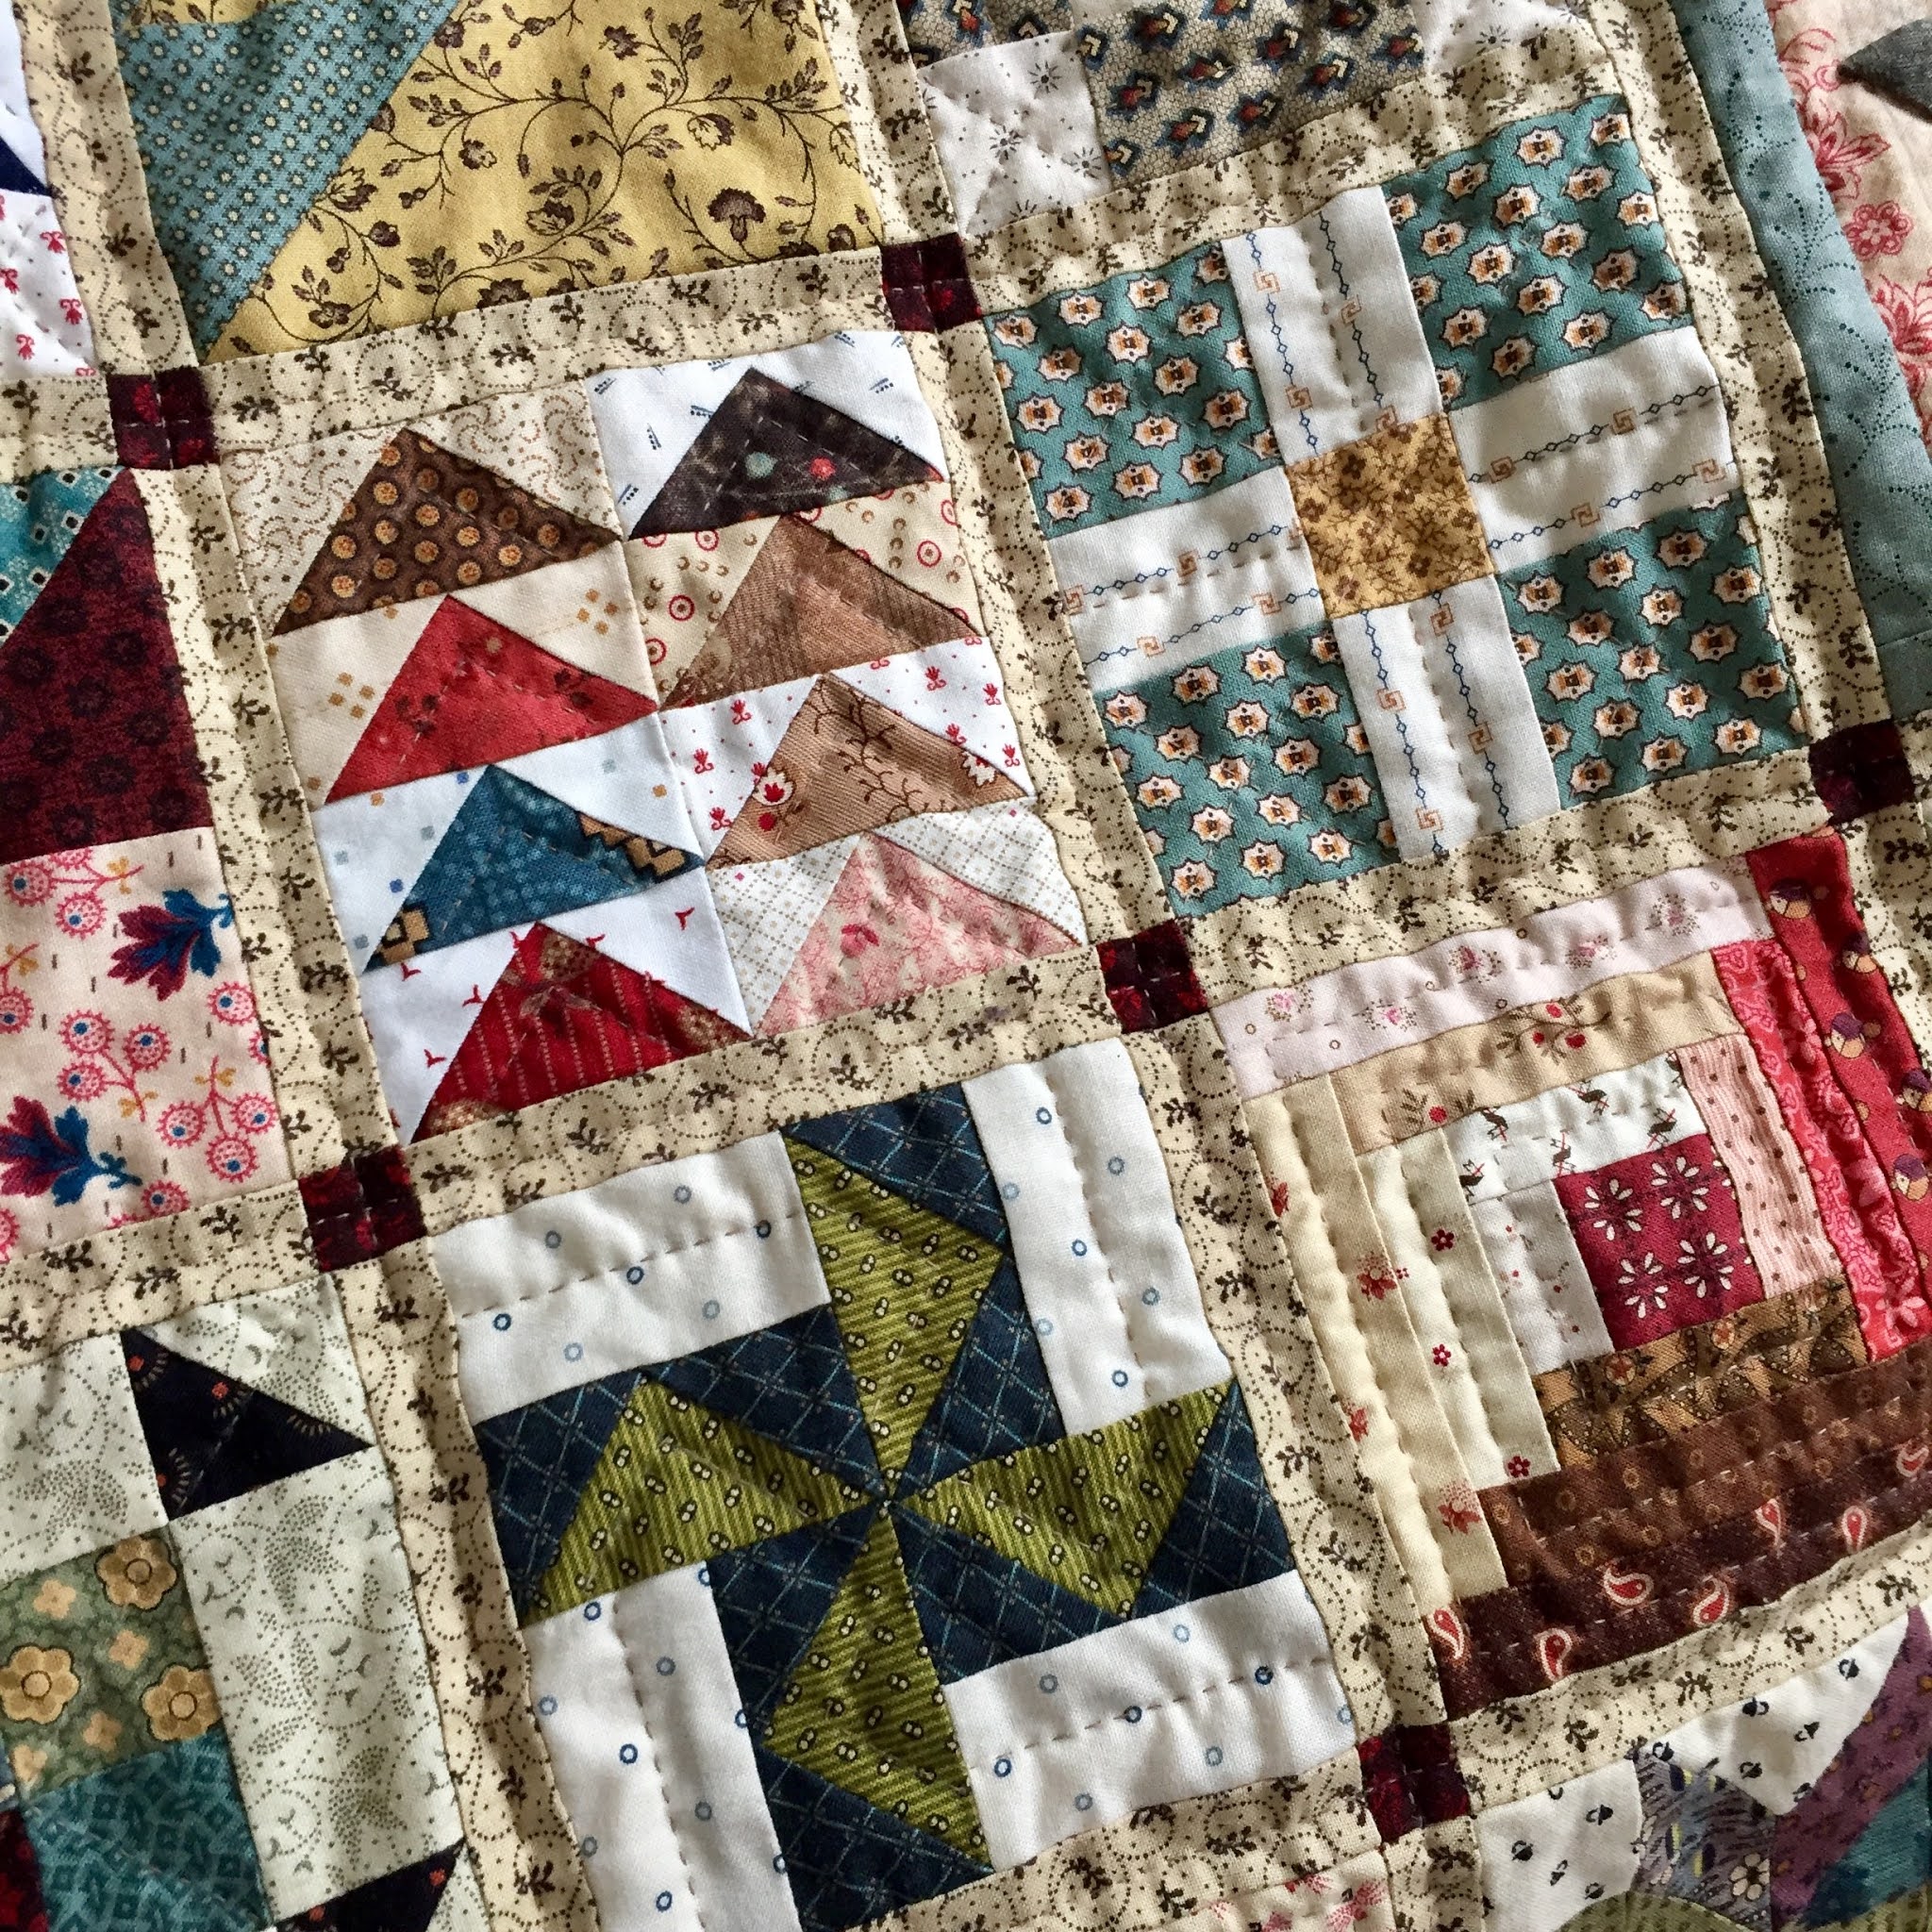
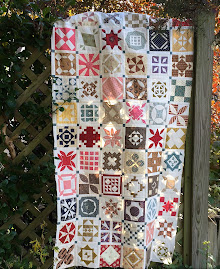
My Schoolgirl Sampler quilt is really fun to make. There are directions in the book for 72 simple little blocks (4" x 4") and they all go together easily. Honestly, what could be more fun??


Mine was hand quilted simply for an antique look.


There are also patterns in the book for six scrappy little quilts using some of the blocks. Here are a few (made by friends Sue and Marian) - 


Mini Sampler doll quilt


Pinwheels doll quilt


Patriotic Stars doll quilt


Whirly Bird doll quilt

The possibilities are endless . . . . .

Schoolgirl Sampler is coming out in early October and I'll be pre-ordering my copies from the publisher soon. Hopefully, it will be available at your local quilt shop as soon as it's released. If you don't care about a signed copy, ask them to order a copy for you and you can avoid shipping costs. If you ARE interested in purchasing a signed copy, I am taking pre-orders on my website and also in my Etsy shop  (Pre-ordering is always recommended since it gives me an idea of how many books I need to buy from my publisher before it comes out. So I have them ready to send out. Copies of books for those who pre-ordered will be mailed out first.) 

There will be plenty of copies available, don't worry,  but keep in mind that there is always a rush as soon as a new book comes out and so if you wait until October, please allow a little time in case I have to restock and order more. I never have a good sense of how many of you want signed copies until you tell me. International quilters may want to visit the Martingale website to purchase an e-book version when it become available. 

*  *  *

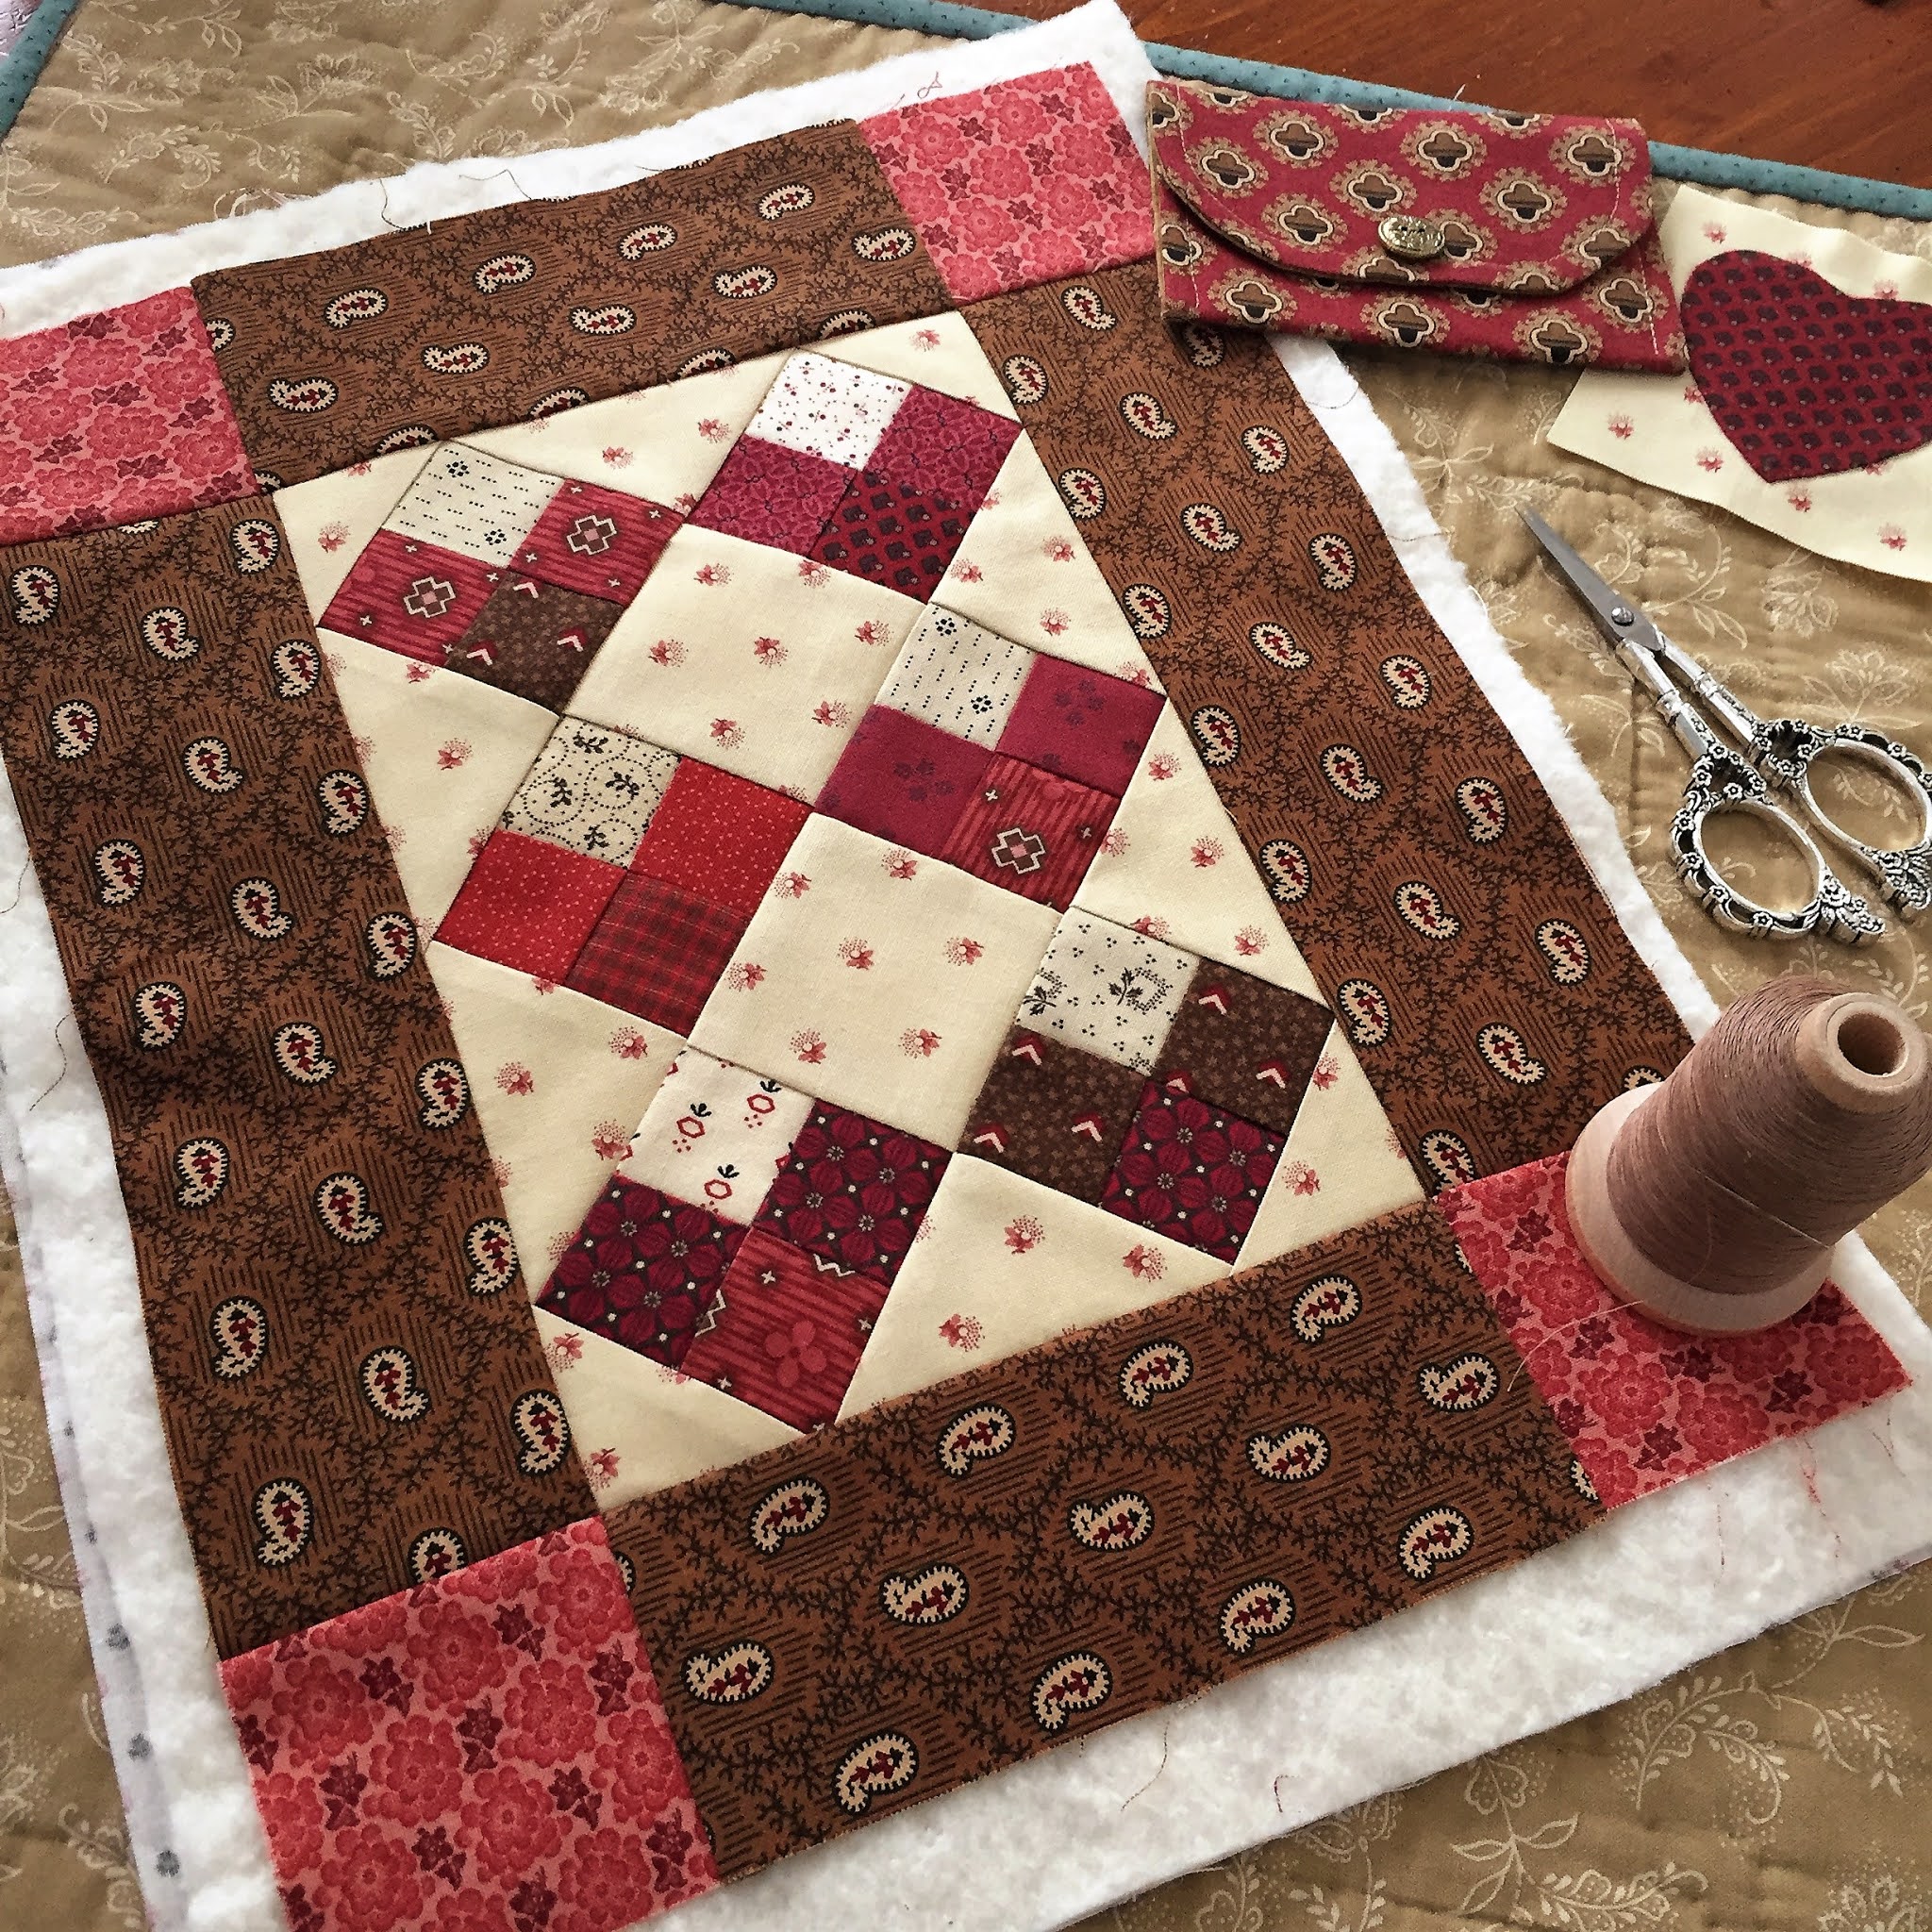
In other news - Have you made the little challenge quilt for August yet?  I actually finished mine early for a change. Such fun to sort through my scraps and then sew these small squares and triangles together into an easy little doll quilt. The free pattern is in the group Files. Still need to work on finishing at least three other small quilts I started this year. Sigh, I'll get to them eventually. 

Oh! Thanks for all of your little needle case kit and pattern orders. Kept me busy last week. I did restock and now have more of that lovely brown floral print for kits. I hope you have fun making these and I look forward to seeing some of them in the FB group or on Instagram. 

Stay safe and eat healthy. These are crazy times. Take a walk if the weather permits. It's finally a little cooler here in the Chicago area and it feels good to get back outside. It's cool in the woods if you can get to a forest preserves or find a nature trail. 

Next time I'll try harder to find one that allows dogs on the paths. Puppy is still reeling because I didn't take her with me last time. I told her the sign said - NO DOGS ALLOWED. This means you, my pet (who thinks she's a human) . . . .  

If looks could kill . . . 


Friday, July 31, 2020

Nineteenth Century Needle Cases

A few years ago I taught at a quilting retreat and someone brought in her collection of antique sewing kits from the 19th century. I've had needle cases on my mind lately and so I thought I'd show you a few pics of the antique ones she showed the group.


This case is made of leather with a green silk lining. Exquisite. A beautiful assortment of threads.


The needle holder on this one is embellished with a small blanket stitch and embroidered flowers. So sweet.

Since all of an Early American household's cloth items had to be sewn by hand, hand sewing was an important skill for most females in the 1800s and earlier. These skills were of necessity passed down from mother to daughter at a very early age. Thus, young girls (some as young as twelve) were often very accomplished at needlework. In addition to sewing and mending garments for the family,  we can see many of their skills evidenced in needlepoint samplers of the time period and other fancy work such as embroidery.


Sewing kits were often very personal items and women took care with their contents. Needles, pins and scissors had to be carefully wrapped to protect against rust. Sometimes women ran their needles through the natural oils in their hair to protect them and make them easier to pass through fabric. (We wash our hair much more often than women did in earlier days so I don't think that would work well today!)


This small case is called a Lady's Companion and the other one next to it is also lined in silk. Some of the kits contained bone crochet hooks and stilettos and even a tiny pocket knife.


This purple case came with a note saying "Made by Miss Abby Buckingham and given to me by my mother - 1839." Made of purple velvet and silk with a patent leather outer case.


See the tiny hiding place for the thimble?


Here's a page from an old newspaper folded up into a small packet, unfolded to display some pretty antique glass head pins.


This sewing roll-up contained needles organized by size. Numbers are embroidered in the different sections so every needle has a place. What an organized sewer!

It would be fun to collect some of these antique sewing kits, wouldn't it?  For now, I'll just have to content myself with making sewing kits of my own to cherish and perhaps one day they will be passed along and kept among someone else's treasured possessions. 

After looking at these pictures, I pulled out a few of the needle cases I've made for myself and friends over the years. FYI - There's a cool pattern for a "huswife" needlecase in my book Remembering Adelia. 


There are some simple fabric envelopes in The Civil War Sewing Circle book that you can make to hold sewing things.


 There's even a pattern for a small needle book in my first book American Doll Quilts.


After looking through some of these I decided I wanted to make a roll up sewing kit. After a little experimenting, I came up with this - The Civil War Ladies' Sewing Case. 


During the 18th and 19th centuries, these needle cases or sewing kits with pockets were called "huswifes" or housewives. Used to hold needles, scissors, buttons, thread, they were the essential ladies' home accessory. Soldiers carried them in their knapsacks during the Civil War in order to quickly mend their uniforms or sew on a lost button at camp. 


If you're interested in making one of these roll up needle cases, I just listed this as a pattern in my Etsy shop. There are a few kits available as well in a separate listing. I have lots of patterns but limited kits in several different colors to choose from. All are made with assorted reproduction fabrics. The listing on Etsy shows more pictures and gives a description of the kits. E-mail me if you have any questions. (My e-mail is in my Blogger profile.)

A reminder that my older books are out of print now but you can purchase an e-book of any one of  them through my publisher, Martingale/That Patchwork Place. Some quilters print them out themselves at a place like Staples or other office supply store from the downloadable .pdf file.

Have a nice weekend!


Friday, July 3, 2020

Make a Fabric Pinwheel

Do you remember playing with pinwheels as a child? They always remind me of summer and picnics and the Fourth of July. Not many picnics happening this year I'm afraid . . . .  
 

I've made a few pinwheel blocks and quilts in my day. There's just something I love about them.


Today I'm going to show you how to create a Fabric Pinwheel.  These are soo easy to make and may be just the crafty project for you to make this holiday weekend.  


Here's what you'll need:

Fabric Scraps
Fusible web (Wonder-Under, Steam-a-Seam, Heat 'n Bond, etc.)
Glue stick, hot glue or needle and  thread
Buttons


1.  Pick two pieces of coordinating fabric for each pinwheel. I cut each square 3 1/2"  x   3 1/2" but you can make them smaller or larger. Each pair needs to be the same size. Cut a piece of fusible web the same size as the squares. 


2.  Press the fusible web to the wrong side of one fabric square. Allow it to cool and then peel off  the paper backing. Line up your fused square with the remaining fabric square and iron the sticky fusible web side to the wrong side of that square. Press for about 10 seconds or follow directions for the fusible product you are using.

IMPORTANT: Try not to get the sticky part on your iron. I use an old pressing cloth or the piece of paper the fusible web was attached to and place it on top of the second square of fabric when I'm pressing.

3.    Now you should have fabric fused on both sides. Trim the edges of your square just a bit. If your fabric starts to fray, you could try dabbing a little Fray Check along the edges.

4.  Next, decide which print you want to use as the background (or inside) and place that side up.   Cut each corner of the square on the diagonal  - but stop halfway to the center.


5.  Fold the 4 corners of the pinwheel blades toward the center and stitch or glue them down one at a time. Gluing is faster. Just sayin'.


6.  Sew a cute matching or contrasting button and that's it, you're done.


Some of you might remember that I made these a few years ago. 


This year, I tried making some in red, white and blue for the Fourth of July. Took me less than an hour.  It will be fun to use these new ones on a wreath, don't you think?


If you intend to use these to decorate a vase or flower pot, buy a couple of thin wooden dowels at a craft store and then use some hot glue to stick them onto the back of each pinwheel. If you're feeling particularly lazy (like me) you can also use a hot glue gun to attach the buttons. 

To make smaller pinwheels, just cut your squares a little smaller. Likewise, larger squares make larger pinwheels. 
 
To me, the hardest part of this whole thing is finding just the right button for each center. It's fun to act like a child again and I had a good time playing around with fabric and digging in my old button jar. Working on a simple project like this can make all my stress disappear. Just looking at them makes me smile. 

If you're in my Facebook group, don't forget to make a pincushion for the Patriotic Pincushion Parade tomorrow and post a picture. 


.

Related Posts with Thumbnails