Friday, June 8, 2018

Pretty Baskets

Everyone loves baskets and they've always been a popular motif in quilts. Long ago, there were so many uses for baskets and they were such a part of nineteenth century life that it’s really no surprise that they found their way into quilting patterns as well. We should all have one or two basket quilts in our collection, don't you think?

Here are some basket quilts I've made over the years:


Civil War baskets from my book Remembering Adelia.


Olivia Loves Baskets pattern is available on my website.


Prairie Baskets is from my second book Prairie Children & Their Quilts.


Cherry Baskets is also available as a pattern on my website

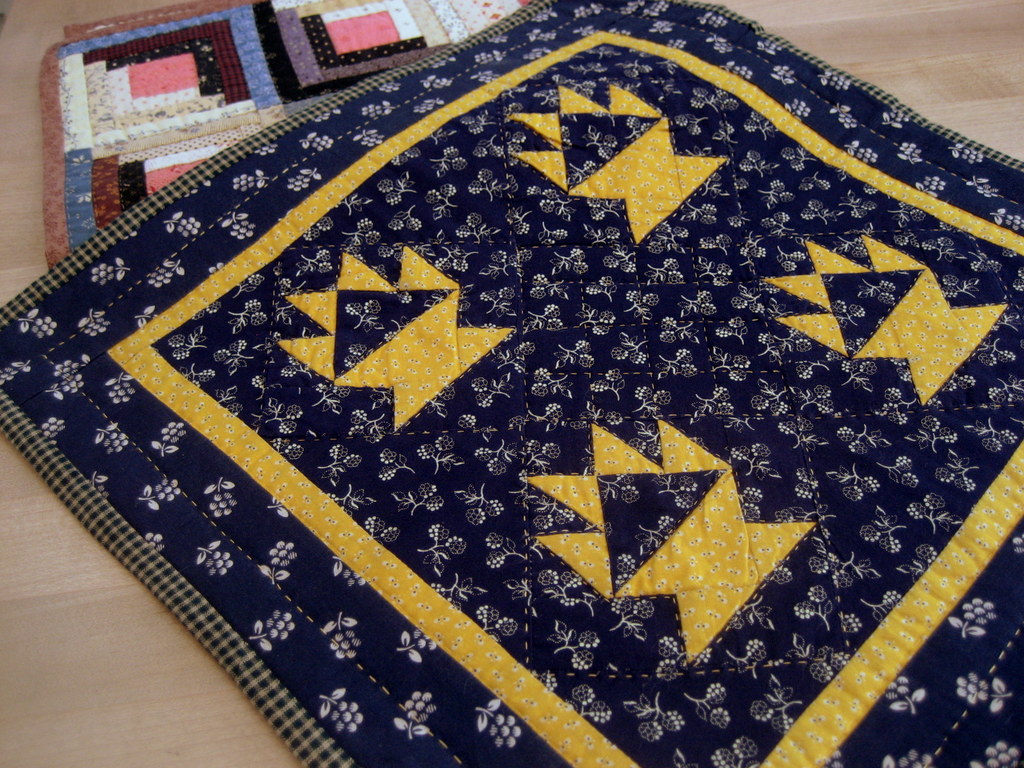
The one below is a vintage doll quilt.


This month in my online groups we're making quilts from 4" basket blocks. It will be fun to see all of the different variations among those who choose to join in since you can make them in your choice of  colors, fabrics and setting. The pattern is in Files in the Facebook group or the Small Quilt Talk group. Go to the sidebar on my blog to find the links.


Here's how to put the block together. (You can find directions to make the basket block in Files in the FB group.)


I have not decided on my setting yet. You can make as few or as many blocks as you wish to complete your quilt. If you only have time to make one block, turn it into a small pillow or coaster. Making a few blocks only takes a couple of hours. I promise I will nag you to work on sewing borders on your quilt next week and then quilting it the week after. By the end of June, you should have it all finished. We get (and give) a lot of encouragement in the Small Quilt Lovers Facebook group. You should join. It's fun.  


My lovely teeny tiny blue and red baskets, a special gift from my friend Marian. 

This is Aunt Sarah's Sewing Basket, from my new book, A Prairie Journey, which will be here in July (or sooner, I hope).


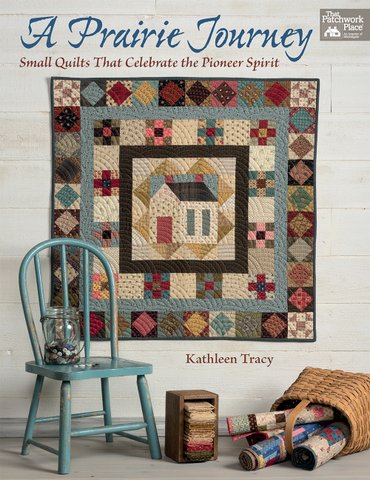
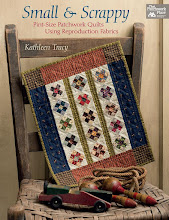
If you're interested in getting a signed copy of my book, go to my website to pre-order and you'll get it as soon as it comes out. (Well, almost. You do have to allow a few days for shipping.)

Have a great weekend!


Tuesday, May 15, 2018

Catching Up with My Mystery Quilt 2018

I hope some of you are following along with my Friendship Garden Mystery Quilt for 2018. Here's where we are so far -


We began in January with the center block -  which was this applique design, or . . .


 . . . instead, make a Star, if you prefer not to do applique. 


Next, we added some borders.


This month we added another border made from tiny 2" hourglass blocks.


Bloc Loc rulers are great for trimming these. 


Or, I really like this Quilt in a Day mini ruler set.  It comes with 2 flying geese rulers and the 2 1/2" square ruler. I use these a lot for making my small quilts.  Cheaper than the Block Loc rulers, which can get awful pricey. But if you use them then it's worth spending the extra money. You deserve it.


Trim those little doggy ears and square up your blocks! It makes everything fit together nicely when you sew. 


 (I'm a little behind. The blocks are made and trimmed but not sewn together yet.)

You can find all the monthly clues in my online small quilting groups or on my website. We'll be adding more borders this month and the next and then finishing up soon. But it's never too late to begin. Lots of pretty quilts are being made and shown in the Facebook group


Friday, April 13, 2018

A Prairie Journey

We're getting close to the release of my next book, A Prairie Journey, and I wanted to let you know that I am now taking pre-orders if you wish to purchase a signed copy. The book will be released in July. I know some of you like personally signed copies of books so I begin taking pre-orders early so that I know how many copies to purchase from my publisher before the book is actually released. Go to my website to purchase and reserve your copy.


Here's what Amazon says about the book:

"Inspired by yesterday's traditional blocks and today's reproduction fabrics, the author of the best-selling Small and Scrappy returns to share more petite quilts with ties to the past. Thirteen designs whisk readers back to an era when the time-honored quilt blocks today's quilters love were just making their debut.

"Stitch projects with names such as Wagon Wheels, Crossing the Plains and Aunt Sarah's Scrap Baskets, or make a Tree of Life friendship quilt featuring blocks autographed by family members [or friends]. 

"Vintage photos and the words of pioneer women from the mid-nineteenth century, a time when quilting offered a welcome respite from the hardships of moving westward, are sprinkled throughout."


The release date is early July. You can go to my website to pre-order a copy. If you would like a personal inscription, then please write that in the appropriate box when you place your order. 

You can also pre-order books from Amazon or your local quilt shop. If you let your shop know ahead of time that you'd like a copy I'm sure they'll order it for you. Plus, you save on shipping.

Here's a peek at some of the quilts -


Sewing Box Scraps


  Crossing the  Prairie
                                                                     

Friendship Is a Sheltering Tree


Child's Play


Barn Raising


Prairie Garden Blooms


There are many more and I'll show you some of those next week. We'll also start using the quilts in this book for our summer and fall small quilt challenges. Have a great weekend!


Saturday, March 17, 2018

Celebrate Quilting

It's National Quilting Day! Let's celebrate. Sew along with me and make this cute little mug quilt


You know I love making small projects and sometimes it's just the thing to get my creativity going. This little pinwheel block is left over from a different project (still unfinished, ugh.) and I decided to use it to make a mug quilt. Isn't it sweet? A mug quilt is something I'll always use and it's always nice to have a few extra lying around just in case. What fun to serve someone a cup of tea with a cute mug rug and see them smile and say "Oh, how cute!"  I am calling this "Whirlwind" because that's the name of the block and also my sewing room right now looks like a tornado hit it because I'm working on many things at once. I know most of you know exactly what I mean . . . .

To make this little project, cut -

2 squares, 2 7/8"  x  2 7/8" from a dark blue print
-        Cut each square once on the diagonal for 4 triangles
1 square, 3 1/4" x 3 1/4" from a pink print
-        Cut twice on the diagonal for 4 triangles
1 square, 3 1/4"  x 3 1/4" from a checked fabric
-        Cut twice on the diagonal for 4 triangles
2 squares, 3 3/4"  x 3 3/4" from a light print
-        Cut each square once on the diagonal for 4 triangles
2 strips, 2" x  6" from a medium blue print
1 rectangle  7"  x 10"  from a backing fabric 
1 strip, 1 1/4" wide, from a pink print for binding
7"  x  10"  piece of thin cotton batting

1.  Sew the pink and checked triangles together as shown.  Make four units like this.


2.  Sew each pink and checked unit together with a dark blue triangle. They finished units should measure 2 1/2".  Make four.


3.  Sew the four units together as shown, two at a time. Then, sew the two rows together, pinning the center as you stitch to make sure your points meet. Your block should measure 4 1/2".


4.  Add the light print triangles to the sides of the block.


5.  Sew the medium blue strips to the sides of your block.


6.  Layer the quilt top with batting and backing and then add the pink binding.  I like to use a 1 1/4" single-fold binding strip in my little quilts to avoid too much bulk.


There are all sorts of fun ways to honor your quilty self today - visit a quilt shop, teach someone to quilt, finish a UFO, organize your scraps. You get the idea. Hope whatever you do today involves at least a little bit of quilting.


Saturday, February 24, 2018

Nine-Patch Fun

The nine-patch block is one of my favorites and I've made these in all different sizes. But mostly for small quilts.


Right now I have three nine-patch quilts in the works that will be larger than the small quilts I typically make. Some of the blocks will still be small and some will be a bit larger. I'm working on these in between sashing my Dear Jane quilt. 


It feels odd making 6-inch blocks when you're used to making smaller ones. They seem huge!


These will be put together into a lap quilt using scrappy six-inch blocks alternated with light print squares. Simple, yes, but scrappy and sort of sentimental.


I'm having a lot of fun playing with my fabrics.


These are 3-inch blocks I'm making for a quilt inspired by a quilt called the Birthday Quilt in Julie Hendricksen's book Preserving History. It's a wonderful book if you love reproductions and antique quilts and it contains quite a few patterns I really want to make. I had the great idea of making a quilt for myself instead of making one for a book, a pattern or a mystery. Something simple. So, this one is going to be MY birthday quilt and just for me to cuddle up in on the couch. 


If you can believe it, the blocks in this quilt are 1 1/2" (!!!). Yes, the BLOCKS, not the pieces. Beautiful,  but that seems just a little crazy to me so I'm making my blocks 3", using 1 1/2" squares, which is still small enough. If I had to make them any smaller I'd get really frustrated and probably quit. After my Dear Jane blocks, it's not like I need even more frustration with tiny pieces. 

For this quilt, I need 240 nine patches and 240 shirting or light squares. Sounds like a lot but they stitch up really fast. I just finished my 130th block yesterday so I'm more than halfway there. I started this last November and then got sidetracked. So I picked it up again to take a break after I put together my first DJ segment. My "loose" goal for the past week has been to try to make 10 blocks every day. I've made blocks 6 days straight so that's pretty good. No pressure, I've got months to finish, but a goal is always good.  Again, it's been fun including a lot of my favorite reproduction scraps in these blocks. 

Have a good weekend! I still have to get in my 10 blocks today . . . . 


Friday, February 9, 2018

Dear Jane Progress

Finally, I had some time to sit down and start sewing my finished Dear Jane blocks together with the sashing. I've been busy but I've also been stalling because it was all a bit scary. How do I do this? Will everything fit together nicely? Or will it be a real pain to get the top assembled? What if they simply do not go together and the quilt looks awful? I went back and forth about the sashing too. The very first Dear Jane quilt I saw in person (made by Karan Flanscha, of Iowa) had cornerstones. Blue cornerstones. I liked the way it looked with cornerstones and I hope Karan doesn't mind I'm using her idea. Jane Stickle's original quilt does not have cornerstones but it made perfect sense to me.


I'm very happy with how it looks and, surprisingly, it wasn't as difficult as I thought it would be. 

This is Karan's quilt - 


I remember meeting Karan when I was teaching a workshop at a guild meeting in Iowa some years ago. My mouth fell open as she showed us her quilt. It was beautiful and I became inspired. She encouraged me to try making this quilt and has truly been an inspiration to many quilters over the years.


I'd been trimming and squaring up the blocks as I went along but I pressed and did it again as I sewed the sashing just to make sure.  I'm always amazed when they turn out to be 5" square. You have to understand, I've been doing this since 2010 and my skills and accuracy have improved since making some of the early blocks. I've used two different sewing machines. Some blocks are hand pieced, some are machine pieced, some are paper pieced. Lots of variation and so much could go wrong. I breathe a sign of relief when they measure up. If you are thinking of making this quilt, be sure to get the official Dear Jane rulers. They're essential. And the software. Don't forget about the software. I would never have finished without the Dear Jane EQ software. A big help for the rotary cutting directions and a lifesaver as I did the paper piecing. Plus, the software contains lots of other info and some great tips. It's almost like taking a class -  all the info you need is right there.


Here's how I'm making the sashing with cornerstones - I cut 5" x 12" pieces from my sashing fabric. Then I cut a 1" x 12" strip from blue cornerstone fabric. I sewed the two strips together and then sub cut that into 1" strips as you can see below. I also cut 1" x 5" strips of sashing fabric. These were first sewn to the right side of a block (see below). The sashing piece with the cornerstone attached was then stitched to the bottom of the block. Then I sewed 6 blocks together with the sashing to make a row. Remember to leave off the sashing around the outer edges of the quilt as you sew the rows together. 


I decided to sew the rows together into four sections. Then I'll sew those sections together. It's a little less cumbersome for me to do it this way. As long as I don't get confused and sew the wrong sections together at the end. I keep the picture of Jane's quilt nearby so I can check every step of the way.


Snow days = Sew days. I stitched a couple more rows together yesterday and hope to finish the first of four sections today. (Don't worry, it's just a little snow. It'll dry. This quilt will probably go through worse before I'm done with it. And it looks so pretty against the white snow.)

Have a fun weekend! It's supposed to snow A LOT more here in the coming days.