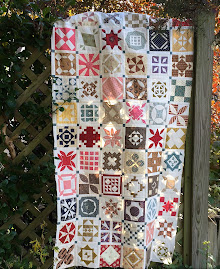
Finally, I had some time to sit down and start sewing my finished Dear Jane blocks together with the sashing. I've been busy but I've also been stalling because it was all a bit scary. How do I do this? Will everything fit together nicely? Or will it be a real pain to get the top assembled? What if they simply do not go together and the quilt looks awful? I went back and forth about the sashing too. The very first Dear Jane quilt I saw in person (made by Karan Flanscha, of Iowa) had cornerstones. Blue cornerstones. I liked the way it looked with cornerstones and I hope Karan doesn't mind I'm using her idea. Jane Stickle's original quilt does not have cornerstones but it made perfect sense to me.
I'm very happy with how it looks and, surprisingly, it wasn't as difficult as I thought it would be.
This is Karan's quilt -
I remember meeting Karan when I was teaching a workshop at a guild meeting in Iowa some years ago. My mouth fell open as she showed us her quilt. It was beautiful and I became inspired. She encouraged me to try making this quilt and has truly been an inspiration to many quilters over the years.
I'd been trimming and squaring up the blocks as I went along but I pressed and did it again as I sewed the sashing just to make sure. I'm always amazed when they turn out to be 5" square. You have to understand, I've been doing this since 2010 and my skills and accuracy have improved since making some of the early blocks. I've used two different sewing machines. Some blocks are hand pieced, some are machine pieced, some are paper pieced. Lots of variation and so much could go wrong. I breathe a sign of relief when they measure up. If you are thinking of making this quilt, be sure to get the official Dear Jane rulers. They're essential. And the software. Don't forget about the software. I would never have finished without the Dear Jane EQ software. A big help for the rotary cutting directions and a lifesaver as I did the paper piecing. Plus, the software contains lots of other info and some great tips. It's almost like taking a class - all the info you need is right there.
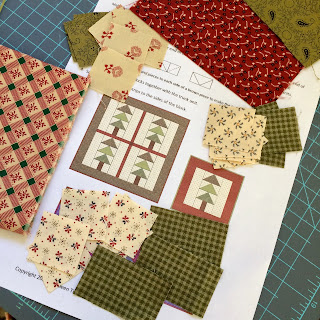
Here's how I'm making the sashing with cornerstones - I cut 5" x 12" pieces from my sashing fabric. Then I cut a 1" x 12" strip from blue cornerstone fabric. I sewed the two strips together and then sub cut that into 1" strips as you can see below. I also cut 1" x 5" strips of sashing fabric. These were first sewn to the right side of a block (see below). The sashing piece with the cornerstone attached was then stitched to the bottom of the block. Then I sewed 6 blocks together with the sashing to make a row. Remember to leave off the sashing around the outer edges of the quilt as you sew the rows together.
I decided to sew the rows together into four sections. Then I'll sew those sections together. It's a little less cumbersome for me to do it this way. As long as I don't get confused and sew the wrong sections together at the end. I keep the picture of Jane's quilt nearby so I can check every step of the way.
Snow days = Sew days. I stitched a couple more rows together yesterday and hope to finish the first of four sections today. (Don't worry, it's just a little snow. It'll dry. This quilt will probably go through worse before I'm done with it. And it looks so pretty against the white snow.)
Have a fun weekend! It's supposed to snow A LOT more here in the coming days.


