Thursday, January 2, 2014

Winter Means Snow

Winter in Chicago means snow. It's been snowing non-stop for 2 days. Happy New Year!


Roads are slick but at least the main streets are plowed.


My street wasn't plowed until very early this morning. And then it snowed even more.

 
It's still coming down.


My pup and I had cabin fever from staying inside yesterday so we drove over to the park this morning, which surprisingly was also plowed in parts.


She hates it when I make her stop for pictures. "Ok, mom, enough  - next time I'm going alone!"
 
 
They say we'll be getting even more. Can't say I'm not prepared . . . .
 
 
It's a Winter Wonderland out there. I love it.


Monday, December 30, 2013

Small Accomplishments for 2014

I love making small quilts with an antique look and, if you follow my blog, you probably do too. Making small quilts can be so much fun. Why, I've even made a career out making small quilts and writing about them . . . .


For the past few years my Yahoo Small Quilt group has attempted to make one small quilt a month from patterns in my books. Some members make all of these challenges and some just make a few. And every year I give them my suggestions to help organize and plan in order to accomplish some of their goals. Worth repeating here.
 
(Small Quilt Talk members, I know you've already heard this a few times - bear with me as I repeat myself . . . again.)


*   *   *
 
It's almost a new year and I know we all want to make a bunch of small quilts again. I suspect many of you get very busy with other things at times. So much can get in the way of our quilting. Sometimes it's overwhelming. But don't let that happen.


This year, 2014, we are going to continue to try to make one small quilt a month all year long. Many of you have bought my books because you like my small quilts and feel they are doable. Make time to make some of  them and, trust me, you will feel so good about actually finishing a few. It does not take as long as you think. Remember, at the end of the year, if you keep up, you will have 12 small quilts made. Or maybe 5 or 6, or even 2 or 3, which is better than none.

Every year I post my suggestions on how to get these quilts finished. If you are determined to make a quilt a month you have to disipline yourself and really really want to make them. If a quilt for a certain month is not to your liking, then choose another from another challenge.

Some of you can make one of these all in one sitting. But I know it's not easy or practical for some of you to do it this way. Don't beat yourself up. Break it up into regular chunks of time and don't pressure yourself to make each quilt all at once. I think you can easily finish one little quilt every month if you do that.


Get yourself a "Small Quilt" notebook (Goody - another reason to run to Target for cute notebooks!) and keep track of your progress. Keep yourself accountable by writing down your small quilt goals every month and do your best to accomplish some of them.


1. First Week - Spend an hour or two to choose your fabrics and cut the pieces. Don't pressure yourself to finish the whole quilt that day unless you want to and have the time. Put this somewhere in a zip lock bag where you can easily see it and return to it.

2. Second Week - Make your blocks. This also only takes a few hours (sometimes less, because remember, the quilts are small).

3. Third Week - Put the blocks together. Probably takes an hour or two. Maybe add the border if you have time or at least cut the fabric for it.

 
4. Fourth Week - Finish borders, layer your quilt with batting and backing and spend the rest of the time finishing/quilting. This often takes the most time, but if you like handwork it can go fast.

All it takes is a little discipline. I find I work best with a schedule and some of you may find that helpful too. You just have to keep at it.

When I have a few projects I need to finish I write them down on a list (or in a notebook, actually) in outline fashion. Then I make a point of breaking the quilt into parts and then checking off the parts as I finish them (cut pieces, make blocks, sew together, add borders, quilt, add binding). This gives me something concrete to look at and remind myself of what I have accomplished on that project. Even a little bit of progress makes me feel good.

Bottom line - You can do this!

-Kathy

*   *   *
 
Join us this month as we make a little Bear's Paw quilt from my book Prairie Children & Their Quilts (and also in the recent book 101 Fabulous Small Quilts published by Martingale & Co. )


(In case you're thinking you cannot do this, no way, keep in mind that all of these quilters finished their small Bear's Paw quilt tops in a 3-hour workshop! Thank you, Cedar Falls, Iowa, quilters for your diligence!)


Saturday, December 28, 2013

What Would Jane Say?

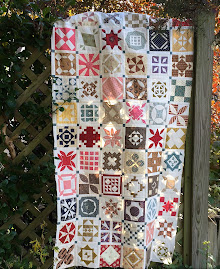
Christmas is over and it's less hectic around here so I thought I'd finish off the year with a bang and try to knock off a few of my Dear Jane blocks. I figured out yesterday that if I make one more block I will be 1/4 of a block away from being a quarter of the way through finishing (That will make Block #56. So, 225 blocks divided by 4 is 56.25. Make sense?) I decided I now really prefer to think of it in these terms - working on my quilt in quarters makes finishing not seem so far away. That's just the blocks, though. Putting the quilt together and quilting it may take almost as long I'm afraid. People around here are being very supportive:  "Way to go, Mom!" "Wow, that's great, Hon." But I can tell that they secretly think I will probably die before I actually finish, LOL. Then what are they supposed to do with this huge unfinished project?? No one has asked me yet.
 
 
Yes, I know, some of you will notice that I forgot to reverse the pattern for this block. I wasn't paying enough attention and when I figured that out as I was cutting the pieces I just kept going. I don't really mind. It's finished.  And I have a feeling Jane would say: Hooray for you! Maybe hers wasn't reversed  either; we'll never know where she got the pattern from or if she designed it all herself. I have a feeling she struggled with some of the blocks too and often said, okay, it's done, I'm not going back and changing this one. On to the next one . . . .


(Dear Jane is the registered trademark of Brenda Papadakis and is used with permission.)
 
I was going to knock off a few easy blocks this week but as I looked at my list of blocks according to difficulty I realized I had probably made too many easy blocks already and was putting off the more difficult ones. So I decided to change tack and make some with reverse applique (easy for some, difficult for me.) I'm not good at it yet but I think I like reverse applique so maybe I'll do a couple more this weekend.

 
Buy Brenda's Dear Jane rulers. They really help with trimming your blocks to the correct size and come in a set of 2 for the squares and triangles.


The biggest help for me is the DJ software by Electric Quilt if you can afford it. I know I would not be likely to do this if not for the software. It alows you to print out the rotary cutting directions, templates and foundation piecing patterns for the blocks. Such a time saver. (Dear Jane is the registered trademark of Brenda Papadakis and is used with permission.)
 
 
Anyway, if any of you are itching to get going on a Dear Jane quilt next year or just want some support for continuing or finishing yours, don't forget I recently started a new DJ Yahoo group. It's sort of an offshoot of my Small Quilt Yahoo group, with a lot of the same people, many just beginning this quilt. Maybe you'd like to Join us . Some in the group are experts and have finished not only one but several DJ quilts. Some, like me, struggle because there is always so much else we have to do in life and yet we keep going, learning new things with each block, picking up another one and feeling exhilarated at crossing it off a list when done. My blocks are not perfect, most are far from it, and sometimes there are months when I just don't have time to make a block so you will fit right in if you are just beginning and worried about keeping up. I try my best and I do think Jane would say "Hooray!" to that.


*   *   *
As far as gifts went this Christsmas, I was focused on what I was going to give others and did not really make out a list for myself. Therefore, because I didn't ask for anything I did not receive anything sewing or quilting related. Oh. Yep, I should have done that. Don't get me wrong, I received some wonderful presents, just not in the fabric, tool or quilting book department. My son was kind of sweet - he gave me a necklace with a sewing machine and the letter K on a chain. That was one of the most thoughtful gifts he's given  me and so I guess that sort of counts.
 
 
My daughter also came through for my husband. You see, he's addicted to Tootsie Pops. The red ones.

 
We all thought this was so cute. It's not really a huge Tootsie Pop, it's filled with smaller ones. I got some Swedish Fish in my stocking. Oh yeah, don't worry, we know and we both solemnly vow to limit our consumption  of  Red 40  . . .  next year.  
 
Have a happy, healthy and productive New Year!


Tuesday, December 24, 2013

Have a Merry Christmas!


Merry Christmas


Love came down at Christmas;
Love all lovely, love divine;
Love was born at Christmas,
Stars and angels gave the sign.
-Christina Rossetti

 
"Yes, Virginia, there is a Santa Claus. He exists as certainly as love and generosity and devotion exist, and you know that they abound and give to your life its highest beauty and joy. Alas! how dreary would be the world if there were no Santa Claus."


Merry Christmas and may hope and peace be with you all for the New Year.

 
Photo: ~ ~ Merry Christmas to ALL and to ALL a Good Night! ~ ~  
Merry Christmas to all and to all a good night,
 
                           -Santa (Kathy)

Friday, December 20, 2013

Andover Fabric Giveaway Winners


Thanks so much to all of you who posted a comment to enter the  giveaway for Jo Morton's Essex fabric. It's always so much fun to read the comments. I'm sure you know that I wanted all of you to be winners.

 A HUGE thanks goes out to Andover Fabrics for making all of this possible. Giving away the fat quarter bundle and 5 charm packs was very generous of them and I know you appreciate it. Jo Morton's new Essex collection features beautiful damask prints on a 100% cotton duck. It's perfect for bags, small upholstery projects, and quilt backing and piecing. (And don't forget that cute memo board I made.)
 
                          Looking to add some refined texture to your projects? Jo Morton's new Essex collection features beautiful damask prints on a 100% cotton duck. It's perfect for bags, small upholstery projects, and quilt backing and piecing. Coming soon.                                    


The Grand Prize winner of the fat quarter bundle is:

                                    Karen   of  The Painted Quilt blog!
                           Looking to add some refined texture to your projects? Jo Morton's new Essex collection features beautiful damask prints on a 100% cotton duck. It's perfect for bags, small upholstery projects, and quilt backing and piecing. Coming soon.

Here are the 5 winners of the Essex charm packs:
  • Karana S  -  kbsouthard
  • Sandy J in cold Minnesota
  • Linda Z in IN
  • Marianne -  mariannesnijders
  • Robin  - solsticestudio  

Thanks again for visiting my blog and Congrats to all the winners!

Winners: Please send me your names and addresses. I will compile a list,  forward it to Andover and they will send you your charm packs. (Click on my profile at the top of this blog for my e-mail).

Again, thanks for entering the giveaway and better luck next time if you did not win today.  Happy Holidays!  
                       Looking to add some refined texture to your projects? Jo Morton's new Essex collection features beautiful damask prints on a 100% cotton duck. It's perfect for bags, small upholstery projects, and quilt backing and piecing. Coming soon.
 

Tuesday, December 17, 2013

Take a Memo - Another Fabric Giveaway

Memo: It's time for another fun Andover fabric giveaway - just in time for the holidays. Starting today, leave a comment on my blog and you'll have a chance to win some fabric. One of you will be the Grand Prize Winner and receive a fat quarter bundle of Andover's new Essex fabric (designed by Jo Morton) that I used to make this cute fabric-covered memo board (also called a French memo board). Even better, 5 of you will win a charm pack of this fabric.


All you have to do to win is follow the instructions below and then leave me a comment to enter. There will be 6 winners in all. Please make sure you leave your name and a way I can contact you if you win.


Okay - read this carefully. In your comment, tell me the top item on your Holiday Gift List.  What would you like Santa to bring you this Christmas? Leave your name in the comment and a way for me to reach you if you are one of the winners.

Comments will close on Thursday night, December 20, and I will announce the winners on Friday. Again, make sure you leave your name and a way for me to contact you if you win.
 
Here's how make a memo board -

1.  First, buy a large foam poster board at an office supply store. 

2.  Decide on the size of your board and pick out your fabric. The Andover Essex fabric is home decorating quality and so is a little thicker than your usual quilting fabric and perfect for this kind of project. I wanted to make mine to hang in the kitchen but we have very little available wall space in our kitchen so I cut the board to about  18"  x  24" to fit in one spot.

 
3.  Cut your fabric an inch and a half larger than your poster board all around.

 
4.  Layer some batting with the fabric (cut it the same size as the board). I found some old polyester batting in the basement that I don't use for quilts anymore and doubled it to give the board a little padding. Place the fabric face down with the batting on top. Then place the board over both.

 
5.  Bring the edges of the fabric over and staple to the back side of board, all around, pulling the fabric taut and starting with the opposite sides.

 
6.  Once the board is covered you can add your ribbon. I used 11 feet of  3/8 inch green satin ribbon. Measure and cut 2 diagonal strips of ribbon, at least one inch larger on each side. Pin then to the fabric, crossing in the center. Staple to the back.


 7.  Mark the center of each side on the back of the board. Measure and cut 4 more strips and place on the diagonal from the center of the long side to the center of the short side, creating a diamond shape on top of the X shape and an overall lattice design. Staple these to the back, again keeping the ribbons taut.


8.  Add some pretty buttons where the ribbons intersect. I stapled the intersections first and then used my hot glue gun to glue the butttons in place.

9.  Hang your board with  3M command strips or hang it from a loop of ribbon stapled onto the back.


There are so many options with this fabric and different colors of coordinating ribbon. I thought at first of using red ribbon for a nice contrast. I think maybe I'll make a few more smaller ones to have in different rooms around the house. Perhaps one for my daughter's room. She said she'd like one in the red fabric with a cream satin ribbon. Yep, more gifts to make!


*   *   *

Leave me a comment and then go make some cookies or finish your shopping and think about what you'd make if you won some of this yummy fabric. And please let Andover know how much you love and appreciate this whole fun holiday giveaway by telling them and "liking" them on Facebook. Good luck to all of you!
 

Saturday, December 14, 2013

More Snow

It's snowing and I'm working on more ornaments -


I didn't make this stocking - bought it at a craft fair a few years ago - but now I know how so I bet I can whip one up.


I'm not the only one who loves this white stuff . . . . It's in and out, all day long.