Wednesday, August 27, 2025

Scissors Love

I love cute little scissors. I have a few pairs of "good" ones that are excellent but they're also kind of plain and boring. My favorite scissors are always the pretty ones that I like to use in display photos. I use them when I sew too but I really think a cute pair of scissors adds a sweet little touch to a photo. And using pretty scissors always makes me smile as I'm hand quilting.


Collecting different kinds of novelty scissors is fun. Lately, it's become one of my favorite go-to Christmas or birthday gift items. "What do you want, Mom?"  Me: "Just go to Etsy and buy me some pretty scissors, please." So, yes, Etsy has a ton of cute scissors. I'm often surprised. I've seen some cute ones on eBay and Amazon too. Mostly decorative and not very expensive.  Cute to look at and use. 


The little heart scissors are made by Kelmscott Designs (The Love Scissors, I believe). I found them on Etsy. Other shops may carry them as well. I have a 3.75" pair and then a couple of years ago my daughter bought me that tiny pair. So that makes 2 heart scissors . . . . a good start to a little collection.                           


                             It's just plain fun to use different scissors every now and then. 


These particular scissors went missing awhile ago. I couldn't remember the last time I used them. Or even saw them. Where the heck did I put them?? I checked and they made an appearance in an Instagram photo sometime in 2019 LOL. Hadn't seen them since. I simply forgot where I put them. (Imagine a quilter doing that, haha.) So, for a few weeks I was obsessed with finding them. Looked in every nook and cranny in my sewing room, in storage cabinets, under the sofa cushions, even behind the sofa (in case I got frustrated while hand quilting and threw them). I looked Everywhere in the house. Every day. Asked my husband if he happened to see a little black box with a pair of fancy scissors inside. I asked him Several times. Did he happen to throw the box away by mistake??  He gave me that look. 

Then, for some strange reason, one day I thought of asking him to remove a heavy desk drawer and look behind it. Voila! The box with the cute little scissors inside had fallen and then became wedged behind the drawer.  Glad that's been resolved but now I have to find another special place to store them so I don't lose them again. You know how that goes. I have to hide them so no one else uses them. You'd think a drawer would be a safe place, LOL. Also, if I remember correctly (!), I was on a scissors kick around then and bought another pair of fancy scissors and now I can't seem to find those either . . . Oh well. (No, they're not behind the drawer. I already checked.) 


              Anyone seen these?? 


I bring out a different pair every few weeks or so and keep them on my sewing table. Then, if I have something to show in a photo, I'll admit I like to strategically place my pretty scissors in the picture. Adds a cute little focal point. Looks like I could use a few more pairs. . . .  Just for the pictures, of course . . . . 


Despite all the pretty scissors, my absolute Favorite practical scissors are the ones with a serrated edge. My blue and green scissors you see here are by Karen Kay Buckley - called Perfect Scissors - and they have a micro-serrated edge. The purple ones are made by KAI.  They are just what the name says -  PERFECT in every way. They're especially terrific to use for applique. 

 
Happy shopping! 


                                                                -Kathy


Tuesday, August 19, 2025

Leftover or Orphan Blocks

What do you do with your leftover quilt blocks? If you ever have any, that is. Whenever I make a quilt I usually make a few extra blocks to play around with the setting. Sometimes, as I'm sewing the blocks together, I'm not happy with one or two blocks that just don't fit in with the others. So having a set of different colored blocks to substitute allows me to play around as I set them in the quilt.  It's fun to sort through them and come up with different ways they can be used. 

That little nine-patch mug quilt in the photo above was made because I was playing around with 1" squares one day to see how difficult it would be to piece something using really small squares. Turns out, not too difficult so I made a bunch. But 1" was small enough and I wouldn't want to go any smaller. I kept the little blocks and then one day turned them into a tiny quilt. I still have a few left over but haven't decided what to do with them. Yet!

Some quilters call these orphan blocks and sometimes those little extra blocks can be used in a whole different quilt. How about a sampler quilt? If they're not all the same size, sew a tiny border around the smaller blocks to make them fit in with the others. Jane Stickle did this when she created her famous quilt.


I remade many of my early wonky Dear Jane blocks because I knew if I didn't they would bother me when the quilt was put together. But some of those blocks are salvageable and perhaps I'll make a DJ runner someday. 


I've got more than one version of that yellow star . . . Each more wonkier than the next, haha. Third time was a charm.

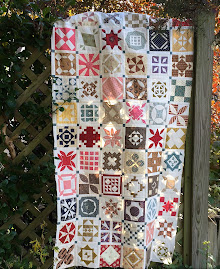
I know quite a few of you used leftover half-square triangles to make the border for your Schoolgirl Sampler quilt. Some of you who have read the book know that my sampler quilt idea was begun when I looked through my pile of extra/leftover blocks and found that many of them were the same size - 4" x 4". And Schoolgirl Sampler was born!


Be creative when using your leftover blocks. They make great pincushions or bowl fillers. Coasters or mug mats. Or, how about using them in a different sewing project - like a bag or tote? Table runner? Find a pretty fabric for a runner and use the blocks as accents on either side. 


Showcase a single pretty block with some borders. 


Leftover star from Scrappy Stars sew along. 


That pink friendship star block was too small but I loved it and wanted to include it in the quilt so I pieced a tiny border around it to make it fit. 

Have fun playing around with your leftovers! 


Wednesday, August 13, 2025

Hand Quilting - Getting Started


How many of you hand quilt some (or all) of your small quilts?  For awhile it seemed to be somewhat of a dying art. But now I'm hearing that there's been a surge in popularity and quilters are being drawn to hand piecing and slow stitching. And I'm always happy to see quilters pick up a needle and thimble and try it. Hand quilting a small quilt is a great way to get started. While hand quilting a large quilt can take a really long time, quilting a small quilt can be done quickly and is just as rewarding. I hear people say they don't have the patience for it but I've found that the patience needed actually comes from the focus and attention paid while you're doing it. Enter the small quilt with simple stitches.


Simple stitches are perfect for hand quilting small quilts. Sometimes you don't need to do much quilting at all to give a primitive, childlike look to a piece. And they don't necessarily need to be perfect. Take a look at antique quilts and see that the stitches are almost never perfect. Some are, but I love the  ones that are not quite exact so you get a sense of the human effort that was involved. The average quilter from long ago was not always making her quilts to purposely enter them in quilt shows. 


Hand quilting doesn't have to be fancy and there are no rules that say you have to be an expert and your stitches have to be perfect before you do it. I do it for fun and relaxation and because I love the look.


I've been asked about the thread and needles I use for hand quilting. I have to stress that everyone is different. And so what works for me may not be right for you. You have to try a few things to see what works best. But here's some things that might help - 

  *   I like YLI hand quilting thread in light brown. Sometimes hard to find. Try eBay, Etsy or Red Rock Threads. Or the YLI company. Cotton thread is best. Look for one that's coated with a glaze that allows the thread to withstand the stress of being pulled stitch after stitch without shredding. 


  *  There is no CORRECT needle to use for hand quilting. Because everyone is different, what is comfortable for me to use may not be right for you. The needle you use can make a huge difference. It should be one you can handle and thread easily or your quilting adventures will be disappointing and frustrating. You will need to select the needle you feel most comfortable using and should try several to see which one fits YOU. Don't give up on quilting until you try several different needle sizes and brands. I often use a different needle depending on the fabric used in the project I am quilting or how my hands are feeling that day.  


Some quilters prefer short needles, some prefer long, thin needles. Small Between needles are always difficult for me. But that's what you hear most quilters say they use. I've been happy with this size 9 by Richard Hemming lately. Not too short. Or John James Gold 'n Glide needles. Or I'll use a longer sharp needle on other days if my hands are feeling kind of stiff or the backing fabric I'm using is starched or stiffer than usual. Clover Milliners' Gold Eye are good. Bohin is a trusted brand. So is Tulip. There are lots of different needles out there to try. check your local quilt shop if you get confused. Packages of needles are pretty cheap so get a few and try them out. Some come in packages of assorted sizes. You may have to practice to see what you're comfortable using. 

My quilting improved when I began to use a longer, thinner needle instead of the tiny needle other quilters told me I should be using. I found I could also load more stitches on the needle and my hand did not tire as rapidly. Know what? The Quilt Police won't even know what needle you're using. My advice: pick a needle that is easiest for you to use. The right needle for you is the one that will allow you to quilt without frustration or pain. Do what makes quilting enjoyable for you. 


* 
Some fabrics are more difficult to quilt through so you may want to try a sharper needle if you have trouble. Starched blocks make hand quilting more difficult too. I try to make sure my backing fabric is soft and not too stiff. Makes it easier on my hands. John James Gold 'n Glide needles work great for me. This is a big reason I do not starch my blocks. Yes, you may get a crisper look to your piecing but it's harder to quilt through. 


*  Cotton batting always works best for me. Quilters Dream Cotton "Request" is my favorite right now for an antique look in small quilts. Polyester batting is easier to quilt through but gives a "puffy" look. Flannel seems too flat for me but it's another popular option quilters recommend. If you buy the Quilters Dream cotton, careful - Quilters Dream Cotton "Select" is a little thicker so better for larger quilts.

*  I mark my quilting lines with a washable marker.  Then just stitch on the lines.


I like the Clover brand. Blue ink pens for marking light fabrics and white ink for dark fabrics. You can see the blue lines drawn in the triangles that I then stitched along. The ink from these Clover pens comes out with a cold, damp cloth rubbed across the lines. I've found that cold water is best as warm or hot water might heat set the lines and make the ink a little more difficult to remove.  Always test on a scrap first and follow instructions on the product you're using. Do NOT press with a hot iron. 

There's also a product called Tiger Tape that comes on a roll. You set it on the places you wish to quilt instead of marking a line. Then stitch along the tape which has lines and markings to follow to help your stitches come out straight and evenly spaced. Even now I will sometimes place masking tape across a block and follow along the edge with my stiches so I get a straight line. 


I really enjoyed hand quilting parts of my Schoolgirl Sampler. Simple stitches worked well for this one. Take it one block at  time . . . . 


If you've tried and given up, Remember, it may not be YOU - it could be the needle, fabric or batting you're using. 


I would love to say I hand quilt all of my quilts but, like many of you, who has the time?? So I do my best and enjoy putting in some simple stitches on my small quilts. Nothing fancy, just enough to give the quilt a little bit of dimension. Hand quilting should be a pleasant, relaxing venture. And it may take awhile to find your rhythm so try different tools to see what makes it most comfortable. Practice! Here's an idea - When I first started quilting I practiced on pre-printed fabric panels. I layered them with batting and backing and just followed the lines on the design. That way I didn't feel like I was ruining a nice quilt I'd pieced if I made a mistake or my stitches were a little wonky. 


I'm far from being an expert on hand quilting, but think about some of my suggestions or ask around at your local shop or guild. Look up some hand quilting videos on YouTube. And then, go ahead, mark your quilt and get started! Hand quilting is fun. It's well worth the effort. But you won't really know until you try.          
                                                                        -Kathy

Saturday, August 9, 2025

Try This Easy Quilting Design

I fell in love with Orange Peels when I made this quilt for my book Remembering Adelia. That was a long time ago but I honestly think many of the quilts we make with reproduction fabrics stand up to the test of time, don't you? I will never get tired of them, no matter how old they are. Certain patterns are just timeless.


This was such a fun quilt to make and really good practice for hand applique with the simple shapes. Here's an entertaining link if you're interested in the history of this pattern. Some historians say it dates back to the American Revolution. 


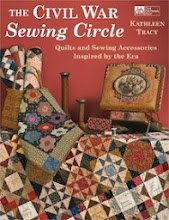
I used that peel pattern as a quilting design on the Pink Patches quilt in my book, The Civil War Sewing Circle


You can easily make a template in a peel shape for your quilting design and mark the top with a washable marker. You might even find a peel stencil. Instead of using a stencil or making my own from template plastic, here's what I did:

I marked the center of the block and then traced around a small bowl with a water soluble marking pen to make a half circle on one side. (Experiment with a bowl or plate that has the right arc that fits your block.) Then I turned the quilt and used the bowl again to trace intersecting half circles around each side of the block. Better than a template because you can do it easily with any size block, large or small - just find the right bowl with a nice arc. Here's a sample square:


Then turn the block and mark on the other two sides with  half circles the same way.


The half circles intersect and you get this peel design when you mark each side of the block with an arc.


Then, just quilt on the lines and dampen or wash the quilt gently to remove all traces of the marking pen. It was easy to do this on a small quilt and it turned out very nice, I think. I'm not sure I'd try it on a larger quilt unless I had a lot of time. You can also mark circles between the blocks to get the same Orange Peel design but doing it this way gave me a little more control as I was working on each block. I especially like the way it looks on the plain blocks where the stitches stand out a little more.


Oh, and if you haven't tried it yet, my favorite quilting thread is YLI quilting thread. Not sure if it's still available in this color but I'm very partial to the light brown as it gives a nice antique look when stitched on both light and dark fabrics. 


Next week I'll try to reprise my tips on hand quilting for those of you just starting out. 


Enjoy your weekend!  I'm already thinking of fall . . . . Still much too hot here in Chicagoland.