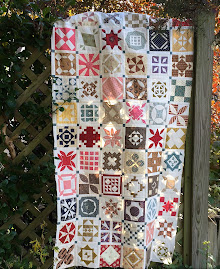
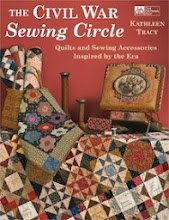
Making prairie points can be a fun way to add a little pizazz to your small quilt. This month, some in my Yahoo group are making this quilt from my book Remembering Adelia that features prairie points and although the instructions in the book are pretty good, I promised a tutorial to give you a closer look.
Prairie points are folded fabric triangles that are often used to embellish the edge of a quilt. The ones I used in my quilt are called "nested" prairie points since each triangle nestles into the one next to it. And I added them in between the top and the border.
1. First, cut an assortment of squares to fit the quilt you are making. (This quilt uses 3" x 3" squares. The number of squares you should cut depends upon the size of your quilt. See rest of directions in book for making them for this particular quilt.)
2. To make a prairie point, fold a square in half diagonally and press to make a triangle. Fold the triangle in half again and press again. (Fold TWICE.)
Fold square in half
Fold again
Make a nice assortment of prairie points from your scraps.
3. Since I already made this quilt, instead of making a whole quilt again for this tutorial, I sewed a few blocks together to show you how to do it. Pretend this is your quilt top : )
4. Place the raw edges of your prairie points along the raw edge of your quilt top and tuck each one into the fold of the one next to it. Pin the points in place and machine baste them to the top using a scant 1/4 inch seam.
Notice how I lined up the edges of the points at the corners - they should not overlap.
5. Choose fabric for your outer border and place it on top of the quilt top just as you would if you were adding a border to any quilt.
6. Sew the border strips in place with the basted prairie points in the middle.
7. You can see how the prairie points are positioned between the 2 layers.
8. Now, press the prairie points outward - toward the border. You may need a little shot of steam or starch to make them lie flat.
Voila! There you have it. Layer your quilt with batting and backing. Finish with some quilting, add the binding and you have a sweet addition that really makes your quilt stand out.
Have fun making these! I'll have another quilt suggestion for next month's small quilt.


17 comments:
Thank you Kathy, Perfect timing! I think I can finish my April challenge, you have answered all my questions on making Prairie Points.
Pat in Arizona
This is fantastic! Great tutorial. Thanks Kathy for showing how easy this is. I will use this on one of my ufo's. Judith, Texas
Perfectamente explicado. Gracias por tu tiempo.
Un beso
Thanks for adding this. You have enticed me to make one. Years ago I did Prairie Points on a Baby Quilt and have never taken the time to do it again. Thanks again for all your inspiration. My quilting has been taking a back seat to life. Wedding of DGD and baby for another. Don't they realize that Nana is getting to old for all this.
Linda in IN
Very well demonstrated.
Kathy, Thank you for this turtorial. I really learned alot from it and found out how easy it is to do - Prairie Points! I enjoy your blog!
Susannah
Thank you very much Kathy. It helps so much to see each step. Today I am going to add my prairie points to my little quilt and get it finished.
Claire
Kathy, this was a fun quilt to make and i was pleasantly surprised at how easy it was to make the prairie points. Like you say, they really do add a little pizzaz to you quilt.
I wonder what next month's SQ challenge might be :)) cheers... Marian
gracias por el tutorial!!!
mi libro esta en camino, lo compre hace una semana,
estoy deseando que llegue
saludos
Thank you, Kathleen. Praire points are so sweet and always remind me of old fashioned quilts.
This is a great tutorial, thanks so much. I made this quilt, but without the prairie points because I didn't think I could make them. Now, I'm going to try again, and I know I'll be able to do them now. You make it look so easy.
Lovely tutorial. I like Prairie points, they just add another dimension.
Merci Kathleen pour ces explications très claires et bien utiles. Je ne laisse pas souvent de commentaires mais j'aime voyager au fil des articles de ton blog. Amicalement.
Oh thank you! Great tut! I feel like now I can try them (prior to this, I was afraid too)! I really enjoy your blog.
Thank you so much! I have a UFO from the 90's. That is all done except for the Prairie points! You have saved my quilt bad given me the encouragement to finish it!
absolument superbe, merci pour le tuto
douce soirée
rose
Gràcies pel tutorial!
Una abraçada
Post a Comment